Monday 24 October 2016

How to Create Your Own Run Command


Hello everyone, There is no doubt that Microsoft Windows is the most widely used operating system in all parts of the world. Apart from being simple to use, it is quite rich in features as well, which makes our lives quite easy.

The Run command available on Windows operating system is one such power packed feature that lets you to open a document or an application instantly with the help of just 1 command. So, rather than clicking several icons or using multiple commands, you can use the Run command to open any program or document instantly. 

But, do you know how to create your own run commands? Well, it is really easy, which involves just few steps. Through this tutorial, I will help you understand how to access your favorite applications by creating custom Run commands.

So lets get start:-

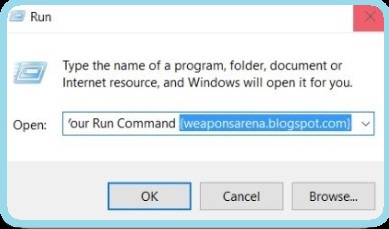
Every one know how to Open Run Command?

Before I show you how to create your own Run commands, let’s take a quick look on how to open Run Command. First of all, you need to open the Run window by just pressing the Windows Key along with the R key, i.e. Windows + R. Now, you have to type the name of the program that you desire to open up or execute. Unfortunately, not all programs can be accessed through this method. So, let me show you how to create Run commands that do not come as inbuilt commands.

Step 1:-

The first step is to select the software or application for which you want to make custom Run command. For example, let us consider Google Chrome as the example here. Remember, you can choose any application other than which is already there in the Run command.

Step 2:-

In the second step, right click on the desktop of your computer system and make a new shortcut. 

Right click > New > Shortcut
As you can see on the picture.


Step 3:-

As you select the Shortcut option in the 2nd Step, it will open up a dialog box. And, the dialog box will ask you path of the application or software for which you want to create the Run command.

Step 4:-

Now, you need to browse through the files and choose the one that shows “chrome.exe”. Well, it is quite obvious that all the executable files can be found in the C drive (or wherever the Operating System has been installed), inside the folder “Program Files”. For example, “C:\Program Files\Google Chrome\chrome.exe.”

Step 5:-

Once you are done with Step number 4, just click on “Next” button and simply provide a relative name to that shortcut. Remember, the same name will be used later in the Run command.{For example, “GC” for Google Chrome}

Step 6:-

Now, click on the “Finish” button. Once it is done, an icon related to that application or software will show up on your computer’s screen. It means that the process of creating shortcut has been done successfully.

Step 7:-

In this step, just cut and paste that recently made shortcut icon into your computer’s root drive, in its Windows folder.

For example, C:\ Windows , Make sure you are the administrator of the computer or have its password.


Step 8:-

Now, you are done with the set up and can run the application through Run Command. Just go to Run and enter the keyword “GC”, and Google Chrome will begin executing.

All done!


Most Dangerous Computer Viruses In History


Hello everyone, i thought that everyone has been at lest once infected with virus. It doesn’t matter what kind of virus it was. The viruses i am going to talk are not simple trojans, spywares or something easy to get caught by antiviruses. it is most dangerous viruses.

What did you do when you got infected?

You just simple tried to delete the virus using CMD code or run a scanner and everything is fixed. The viruses i am going to talk were more than this. You woudn’t even be able to reach your antivirus for scanning. The damages those viruses caused were more than just informations.

So i will tell you the world dangerous viruses, so know about that viruses and keep your computer from this viruses. 

1- ILOVEYOU


ILOVEYOU is the most dangerous virus, it affected 50 million devices. What used this virus to do?

It was very simple. There was an email for you, a love letter with an attachment. Once it was clicked it would make the computer unbootable and it would forward to your contacts. The best part, the two programmers that created this virus, didn’t get affected by any law, at that time there wasn’t any law for malware.


Melissa was just a word document. Once you clicked that file, it will be automatically send to your first 50 contacts. What did that document file supposed to be?
Well, in the document file was supposed to be some porn sites password, but in reality there was just a script.


SQL Slammer was an internet worm, it used to slow Internet Traffic. Over 200,000 PCs infected and almost $1,200,000,000 damage.  This virus was to sent to random IP addreses which had no protection at all.

4- Code Red


Code Red a computer worm which infected over 1,000,000 Pcs. How did it spread? It randomly selected 100 IPs, scanned for Microsoft system and then spread to those computers.


Mydoom used to spread also by emails. It used to spread from your contacts, to your friend , family etc. Over 2,000,000 PCs were infected by this virus. The spread was faster than any other virus. The virus contained this senteance “andy; I’m just doing my job, nothing personal, sorry,”

Which makes us think that this was something personal. The author of this virus is still unknown and in some ways this virus is still around today.

So be safe with these type of viruses.


How to Request or Assign a New IP Address


Hello everyone, you are trying to download, but the website will limit the download for your IP {once in 2 hours or 24 hours, it depends},this is a good trick if you want to avoid any limitation from any website.

So let get start,

1- Go to Start->Run.

2- Open CMD {it would be better if you start it as Admin}.

3- Enter those commands.
      ipconfig /flushdns
      ipconfig /release

      ipconfig /renew

4- Clean your cookies in the browser you are using.

In some moment you will be assigned in a new IP address. Notice, this method will not work if you have fixed IP. If you don’t have a fixed IP address and this method works, you may want to create a batch file and then run whenever you need to use those commands, it will save you time.

Note# Don’t forget to type ENTER after each line of the code. There are much more commands to write, but these are the most important and most used ones.

Wednesday 19 October 2016

How to Use Your Smartphone As Mouse And Keyboard


Hello everyone, I Know some times you though that if you could use your Android Phone as mouse and keyboard for your computer, so don't worry there is no need to buy expensive equipments now. You can control your PC from your Android. To do this, you will need to install one software on your PC and a 15MB application.

So lets get start.

1- Start by downloading the Remote Keyboard for Android from Google Play.

2- Download the application for windows form here.

3- Make sure your computer/laptop and your Android Phone is connected in the same WiFi.

4- In your Android, you will see a device, which is your Windows System.

5- Your PC will display a code which you need to verify it by scanning with your Android Camera. If your devices pair with each other then you are good to go. for more follow the instructions on your application.


Notice- This trick will work only on computers/laptops which are Intel based systems.

How To Watch +18 Videos Without Signing In You Tube.


Hello everyone, everyone know about the youtube, youtube is a site of all types of videos it is like a Home TV you can watch or save anything you want, sometimes is very annoying when YouTube asks you to sign in for watching some qualified +18 videos. You may be in hurry and no time to sign in to open the video, this is why i will tell you a short steps. How to watch 18+ videos without logging in. This trick works without downloading any software, it’s just a simple URL trick.

So let get  starts.

1-  First get the URL of the video you want to watch.
       For example: www.youtube.com/watch?v=4Xkh6j7RMqk.

2- Copy the video ID. The ID of the link above is 4Xkh6j7RMqk.

3- Now what you have to do is, add that ID to the link below:

4- Replace the VideoId with the ID you got in step 2.

So the link will look like this:
www.youtube.com/v/4Xkh6j7RMqk?fs=1

All done, This is the fastest way to access 18+ videos on YouTube without having an account or signing in. It will save you some time, and there won’t be needed to loggin eveytime you want to see something that on YouTube is set as 18+ video which contains graphic language, pictures etc etc.

How to Delete Google+ Google Plus Account


Hello everyone, every one know about the gmail, whenever you make a new Gmail account you are given an option to get a Google+ account associated with it. You can see the new features in you account due to Google+.

Some people have more than one Gmail accounts but they want to have only one Google+ account. While some people don’t like it and they just want to get rid of it. So here , i will tell you 5 simple steps to remove Google+, if you make it by mistake or you get bored with it.

So, let get start.

Step 1-
Go to your Account->Account Preferences and click on “Delete profile and remove related Google+ features” at the bottom of the page.
You will be moved to a page which will ask you whether you want to delete only your Google+ profile or the whole Google Account.
Step 2-
Select the first option “Delete Google+ Content” as you want to delete only Google+ Account. Choosing this option you will not lose the other services of Google you use.

Step 3-
When you will click on the first option you will be shown a list of the things that will be done to your Google+ Profile and services related to Google. Now check “Required: I understand that deleting this service can’t be undone and the data I delete can’t be restored.” to be able to delete your profile.

Step 4-
Click on “Remove Selected Services”.

Step 5-
Now you will be moved to a page that will tell you that the deletion was successful. You will also be asked to tell the reason that you deleted it. Write the reason and click the submit button.

All done, your account is deleted and your page looks much different.

Tuesday 11 October 2016

Best 3D modeling softwares [LATEST]


3D visualization is very important now a days . Specially after the release of some of the best 3D modeling software's in the late 80's and in the beginning of 90's .
Because of these 3D modeling software's life has become lot more easy and  companies are doing there work more quickly by the help of 3D draftsmen. Now lets head towards our 3D software's list without wasting any time .


No.1 [Blender]


Blender is an open source 3D modeling software which means its free . Blender has a better UI than rest of the 3D modeling software's. Blender has some video editing features like after effects.
Blender was initially released  in 1995 by Blender Foundation. Not an industry standard but will be in coming days.

Support:
The update frequency of blender is amazing they really fix bugs very quickly there are lots of free addons available for blender and more are coming its recent version has been released recently in October which is realy excited. It has a very active community on the web you will easily get 100's of free tutorials on YouTube.

Modeling:
If you want a 3D modeling software for game creation , animation , Machine modeling or Architectural [Interior  exterior designing ] purposes than blender is the first choice . It has builtin addon for tree creation so its good for modeling natural scenes or you can place these trees in your Architectural visualization.

Lighting:
Lighting setup in blender is quite time consuming but it will save your pocket because blender can do what a non-free addon can do like blender can produce same results as V-Ray or Octane-Render just you need the right skills to use the blender lighting setup which includes Point light , Spot light , Sun light and the best one area light .

Texturing:
Blender has a wide range of texturing options like UV-unwrapping or Smart wrapping and can really show the real depth of the textures.

Rendering:
It has a very good sample based rendering environment and a very powerful render engine called cycles render engine it has both CPU and GPU support. Produces brilliant renders without third-party addons.

No.2 [3D Maya]


3D maya full name Autodesk Maya often called just 'Maya' is a product of Autodesk Inc . It was initially released in 1998. It is a subscription based software which means is not free but Autodesk offers an student version for free.

Support:
Maya has 24/24 hours support from its management . Its tutorials are available on the Autodesk site and YouTube . Regular bug fix power full addons available.

Modeling:
Excellent modeling usually Maya is used for animation creation and movie making but it can be handy in other stuff also.

Lighting:
Lighting is pretty good in Maya but if you need industry standard lighting setup you need to buy third party addons like V-Ray or Octane-Render.

Texturing:
Maya has good texturing options like UV-unwrapping supports depth texturing .

Rendering:
For Maya Autodesk inc offers an online rendering option which is really good if your renders are time consuming its like those big render farms but free. Beside it Maya itself has good rendering engine.
Link:
Download Maya

No.3 [3D Max]


3D Max formally known as 3D studio Max is a product of Autodesk inc and it was initially released in 1990.
3D max is widely used in Architectural firms.

Support:
3D Max has a very good support quick bug fixes and quick release of new features but it is not freely available for commercial use . Instead you can get a student version for learning or for your own personal use . Good import and export support for other Architectural software's like Autocad.

Modeling:
Excellent modeling features available for House , building or interior exterior modeling works like already builtin different kind of stairs and rails are there which reduces time and you can model approximately by importing Autocad files.

Lighting:
Good lighting but as told above in almost every Autodesk software you need external lighting engines for industry standard results.

Texturing:
Brilliant texturing which can be used easily in all models . Many texturing styles available.

Rendering:
Rendering in 3ds max is good but best with external render engines .
The plus point for all the products of Autodesk inc is that they offer cloud rendering which is quite handy in bigger rendering projects.

No.4 [Google Sketchup]


Google Sketchup currently known as Sketchup is a great 3D modeling software . It was initially released in 2007 as a general purpose 3D modeling software but recently it got superb attention by Industries of different fields like Civil Engineering Mechanical and Architectural

Support:
It has really very fast support which is brilliant. It is new in the market but still managed seek a very good attention from the industries that means it can secure the number one position in the race of 3D modeling software's in coming future.

Modeling:
Very good and easy to understand modeling features which can produce tremendous results if used wisely . Moreover Sketchup has managed to built a very active community on the web like there are sites where there are free 3D models available for use like Doors , windows , trees , stairs . 

Lighting:
Brilliant lighting setup available in sketchup and also free lighting engines are available which is good for those who don't want to put heavy loads on their pockets in this matter .

Texturing:
Like other 3D modeling software's above , Sketchup has all the features required for texturing . Actually i ranked it after 3D max and Maya because it isn't available for free for students. And it has less tutorials on the web then these two may be because its not very old in the market.

Rendering:
Rendering is made easy in sketchup because of the availability of free render engines like Kerkythea which is a standalone rendering solution with ray-tracing and other lighting supports.

Link:
Download Sketchup


No.5 [Autocad]


Autocad is the oldest product of  Autodesk . Its is really hard to learn by your own because it is based on poly lines and there are so many commands for simple tasks like a single line is drawn by the L or Line command . It is a very accurate software. It is generally know for Architectural works.

Autocad was initially released in December 1982 by Autodesk inc.

Support:
Really very active support making it to work with the latest industry standard software's.

Modeling:
As i told you above that its more a command based software which works generally on commands which be a plus point for and a negative point for others because through we don't need to go here and there in the software just type the command and feature is in front of you while autocad also has visual selection option so it totally depends which method you want to use
Autocad normally work with solids instead of meshes but there is an option for the user to work with meshes and personally i don't like working with meshes in autocad because it crashes a lot. And doesn't produce realistic meshes.

Lighting:
Good lighting specially sun and location system which lets you set the sun lighting according to the area you are living in. External lighting engines available like Octane and Vray .

Material and texturing:
Autocad has a builtin library of materials which let you create realistic looks .
For texturing you need to add external texture created in Photoshop or something like that .

Rendering:
Rendering in autocad is really very quick may be because of solids being used in it .
It has also cloud render support by autodesk which let you render bigger and time consuming renders.


These software's are ranked on my personal opinion and it isn't necessary that the software i ranked first will be the first for everyone difference of opinion exists so please avoid harsh comments.

Monday 10 October 2016

The Best Antiviurs For Android 2017


Hello, friends nowdays Antiviruses are very important. Everyday there are developed hundreds of viruses to attack your system. 

Here comes the Antivirus Software, to protect you from diffren attackers, and keep your system clean and running. This time i am going to talk about Android Antivirus, diffrent from computer users, on phone softwares are free.

This is the list of Antivirus for your Android Phone:


360 Security Will keep your system clean and safe from viruses and trojans. It will work in background and you will not even notice the performance of this application. You don’t have to worry about your battery, background apps, memory, cache since your system will be optimized.

Installed apps and local APK files will be monitored in real time and scanned at the same moment. By downloading this antivirus, you will also get the free boost option. RAM memory boost, and your Android performance will be diffrent.


Mobile Security & Antivirus scans and secures against infected files, unwanted privacy phishing, malware, spyware, and malicious viruses such as trojans. Diffrent from the above antivirus, you won’t be able to get a boost for your phone, but there are other features this Antivirus offers. It is mostly concetrated on your privacy, to keep you safe from attackers or spammers, Avast offers, Call Blocker and App Locker. With these two you will be able to block any caller ID and add password to diffrent apps.


The antivirus by ESET is a little bit diffren from the above applications, with this you can Remote Lock, Remote Siren, GPS Location and Remote Wipe. There is also an option to buy premium Antivirus but we are talking for free antivirus apps in this thread. You will be able to change ESET permissions (disable monitoring, photos etc)

Save your mobile with these antviruse. 

How to Convert Your Flash/Pen Drive Into RAM


Hello friends, i thought many of you have a old computers which don't have sufficient Ram as you want, and you could not do any thing that you want, also your computers getting so slow when you play big games or watch a HD films, So i made this tutorial for you people to make your your Pen-drive as Ram and enjoy every thing that you want.

This is a trick which will help you increase the speed of your computer, but the difference will be slightly. So let's get Start-

1-Insert a flash drive

2-Open up the Control Panel.

3-Go to “System.

4-Choose the advanced Tab.

5-In the Performances section, click on “Settings.”

6-Choose the advanced tab there.

7-In the “Virtual Memory” Section, press “Change.”

8-Select the letter corresponding to your flash drive. (Hint: It’s not C.) You can let the system manage the size or customize the amount of space that you want used as virtual memory. I’m not going to use this flash drive for anything else, so I’ll let the system manage it.

9-Make sure to Press Set once you’ve made your choice.

10-Press OK, and the changes will take effect.

11-Then restart your computer.

Done Your Pen-drive is ready as Ram and you can enjoy you films and games.

List of all Run Commands


Hello friends, some times you have to open the thing or find the thing in your computer faster but you can't because you don't know the commands that open the thing exactly you want, i tried to find all the possible commands that can be used in your Run tab. You can use those commands to check for computer information, you can find something faster by just writing the command, you need to edit something, etc etc.

This is why those commands are important, well none of us can remember all of them. There are more than a hundred Run Commands, you will be able to remember them only if you use the commands everyday.

So there are the useful commands that you can use in your daily life.

SQL Client Configuration – cliconfg
System Configuration Editor – sysedit
System Configuration Utility – msconfig
System File Checker Utility (Scan Immediately)- sfc /scannow
System File Checker Utility (Scan Once At Next Boot)- sfc /scanonce
System File Checker Utility (Scan On Every Boot) – sfc /scanboot
System File Checker Utility (Return to Default Setting)- sfc /revert
System File Checker Utility (Purge File Cache)- sfc /purgecache
System File Checker Utility (Set Cache Size to size x)-sfc/cachesize=x
System Information – msinfo32.
Task Manager – taskmgr
System Properties – sysdm.cpl
Task Manager – taskmgr
TCP Tester – tcptest
Telnet Client – telnet
Tweak UI (if installed) – tweakui
User Account Management- nusrmgr.cpl
Utility Manager – utilman
Windows Address Book – wab
Windows Address Book Import Utility – wabmig
Windows Backup Utility (if installed)- ntbackup
Windows Explorer – explorer
Windows Firewall- firewall.cpl
Windows Magnifier- magnify
Windows Management Infrastructure – wmimgmt.msc
Windows Media Player – wmplayer
Windows Messenger – msmsgs
Windows Picture Import Wizard (need camera connected)- wiaacmgr
Windows System Security Tool – syskey
Windows Update Launches – wupdmgr
Windows Version (to show which version of windows)- winver
Windows XP Tour Wizard – tourstart
Wordpad – write
Password Properties – password.cpl
Performance Monitor – perfmon.msc
Phone and Modem Options – telephon.cpl
Phone Dialer – dialer
Pinball Game – pinball
Power Configuration – powercfg.cpl
Printers and Faxes – control printers
Printers Folder – printers
Private Character Editor – eudcedit
Quicktime (If Installed)- QuickTime.cpl
Real Player (if installed)- realplay
Regional Settings – intl.cpl
Registry Editor – regedit
Registry Editor – regedit32
Remote Access Phonebook – rasphone
Remote Desktop – mstsc
Removable Storage – ntmsmgr.msc
Removable Storage Operator Requests – ntmsoprq.msc
Resultant Set of Policy (XP Prof) – rsop.msc
Scanners and Cameras – sticpl.cpl
Scheduled Tasks – control schedtasks
Security Center – wscui.cpl
Services – services.msc
Shared Folders – fsmgmt.msc
Shuts Down Windows – shutdown
Sounds and Audio – mmsys.cpl
Spider Solitare Card Game – spider
Malicious Software Removal Tool – mrt
Microsoft Access (if installed) – access.cpl
Microsoft Chat – winchat
Microsoft Excel (if installed) – excel
Microsoft Frontpage (if installed)- frontpg
Microsoft Movie Maker – moviemk
Microsoft Paint – mspaint
Microsoft Powerpoint (if installed)- powerpnt
Microsoft Word (if installed)- winword
Microsoft Syncronization Tool – mobsync
Minesweeper Game – winmine
Mouse Properties – control mouse
Mouse Properties – main.cpl
Nero (if installed)- nero
Netmeeting – conf
Network Connections – control netconnections
Network Connections – ncpa.cpl
Network Setup Wizard – netsetup.cpl
Notepad – notepad
Nview Desktop Manager (If Installed)- nvtuicpl.cpl
Object Packager – packager
ODBC Data Source Administrator- odbccp32.cpl
On Screen Keyboard – osk
Opens AC3 Filter (If Installed) – ac3filter.cpl
Outlook Express – msimn
Paint – pbrush

Keyboard Properties – control keyboard

IP Configuration (Display Connection Configuration) – ipconfi/all
IP Configuration (Display DNS Cache Contents)- ipconfig /displaydns
IP Configuration (Delete DNS Cache Contents)- ipconfig /flushdns
IP Configuration (Release All Connections)- ipconfig /release
IP Configuration (Renew All Connections)- ipconfig /renew
IP Configuration(RefreshesDHCP&Re-RegistersDNS)-ipconfig/registerdns
IP Configuration (Display DHCP Class ID)- ipconfig/showclassid
IP Configuration (Modifies DHCP Class ID)- ipconfig /setclassid
Java Control Panel (If Installed)- jpicpl32.cpl
Java Control Panel (If Installed)- javaws
Local Security Settings – secpol.msc
Local Users and Groups – lusrmgr.msc
Logs You Out Of Windows – logoff…..
Accessibility Controls – access.cpl
Accessibility Wizard – accwiz
Add Hardware – Wizardhdwwiz.cpl
Add/Remove Programs – appwiz.cpl
Administrative Tools control – admintools
Adobe Acrobat (if installed) – acrobat
Adobe Designer (if installed)- acrodist
Adobe Distiller (if installed)- acrodist
Adobe ImageReady (if installed)- imageready
Adobe Photoshop (if installed)- photoshop
Automatic Updates – wuaucpl.cpl
Bluetooth Transfer Wizard – fsquirt
Calculator – calc
Certificate Manager – certmgr.msc
Character Map – charmap
Check Disk Utility – chkdsk
Clipboard Viewer – clipbrd
Command Prompt – cmd
Component Services – dcomcnfg
Computer Management – compmgmt.msc
Control Panel – control
Date and Time Properties – timedate.cpl
DDE Shares – ddeshare
Device Manager – devmgmt.msc
Direct X Control Panel (If Installed)- directx.cpl
Direct X Troubleshooter- dxdiag
Disk Cleanup Utility- cleanmgr
Disk Defragment- dfrg.msc
Disk Management- diskmgmt.msc
Disk Partition Manager- diskpart
Display Properties- control desktop
Display Properties- desk.cpl
Display Properties (w/Appearance Tab Preselected)- control color
Dr. Watson System Troubleshooting Utility- drwtsn32
Driver Verifier Utility- verifier
Event Viewer- eventvwr.msc
Files and Settings Transfer Tool- migwiz
File Signature Verification Tool- sigverif
Findfast- findfast.cpl
Firefox (if installed)- firefox
Folders Properties- control folders
Fonts- control fonts
Fonts Folder- fonts
Free Cell Card Game- freecell
Game Controllers- joy.cpl
Group Policy Editor (XP Prof)- gpedit.msc
Hearts Card Game- mshearts
Help and Support- helpctr
HyperTerminal- hypertrm
Iexpress Wizard- iexpress
Indexing Service- ciadv.msc
Internet Connection Wizard- icwconn1
Internet Explorer- iexplore
Internet Setup Wizard- inetwiz
Internet Properties- inetcpl.cpl

These are the useful commands that you can use, i will finding more and posted in next tutorial.