Showing posts with label How To Do. Show all posts

Sunday, 20 November 2016

How to Create a Bootable or Multibootable USB Flash Drive


Hello friends, Some times you used the CD to format your computers, but some times it can't work or you have urgent so here, this tutorial is to create the Bootable or Multibootable USB Flash Drive.

So let's get Start- To create a bootable USB it is very if you use one of the tools i will write about below. 


Tool 1#- YUMI – Multiboot USB Creator (Windows)

YUMI (Your Universal Multiboot Installer), is the successor to MultibootISOs. It can be used to create a Multiboot USB Flash Drive containing multiple operating systems, antivirus utilities, disc cloning, diagnostic tools, and more. Contrary to MultiBootISO’s which used grub to boot ISO files directly from USB, YUMI uses syslinux to boot extracted distributions stored on the USB device, and reverts to using grub to Boot Multiple ISO files from USB, if necessary.

Aside from a few distributions, all files are stored within the Multiboot folder, making for a nicely organized Multiboot Drive that can still be used for other storage purposes.

Creating a YUMI Multiboot MultiSystem Bootable USB Flash Drive
YUMI works much like Universal USB Installer, except it can be used to install more than one distribution to run from your USB. Distributions can also be uninstalled using the same tool. Download this tool from here.

How to Create a MultiBoot USB Flash Drives using YUMI USB creator


1# Run* YUMI-0.0.4.8.exe following the onscreen instructions

2# Run the tool again to Add More ISOs/Distributions to your Drive

3# Restart your PC setting it to boot from the USB device

4# Select a distribution to Boot from the Menu and enjoy!

That's done there is to it. You should now be booting your favorite distributions from your custom Multi-Boot USB device.

How It Works#  YUMI (Your Universal Multiboot Installer) enables each user to create their own custom Multiboot UFD containing only the distributions they want, in the order by which they are installed. A new distribution can be added to the UFD each time the tool is run.
If you run YUMI from the same location you store ISO downloads, they should be auto-detected (*See Known Issues Below), eliminating the need to browse for each ISO.

Note#: If MultibootISOs was previously used, you must reformat the drive and start over. YUMI uses Syslinux directly, and chainloads to grub only if necessary, so it is not compatible with the older Multiboot ISO tool. Although I do plan to add back the capabilities of MultibootISOs as time permits.
The distro uninstaller works great, but unlisted ISO’s that have been added must currently be manually removed!

Tool 2#- XBOOT – Multiboot ISO USB Creator (Windows)

XBOOT is yet another neat little Multiboot ISO USB Creator. It is a Windows based application that can be used to create a Live Multiboot USB or even a Multiboot ISO file that can then be burnt to a CD/DVD. XBOOT supports many Linux Distributions and Utilities, and allows you to use your choice of a Grub or Syslinux bootloader. Also included is a built in QEMU emulator (enabling you to boot an ISO from within Windows). Download from here.

Download the latest version of this tool.
1# Drag and drop some ISOs into the XBOOT window

2# SelectCreate USB.


3# Select your USB Drive from the Droplist.

4# Select a Bootloaderto use.

5# Click OK to begin.

A copy notification window appears to keep you informed of the progress. Once the process is complete, you should have a Bootable Multiboot USB Flash Drive with your ISO selections installed. 

All done!!

How to Make your Computer Welcome You On Startup


Hello everyone, As we all know, windows is a very powerful OS every computer that uses Windows have a welcome screen. You can change it to whatever you want by using a simple code, this will make your computer show anything you want. Not only that, but it will spell what you have written.
Many of you may know about it, but there are some others that would enjoy sharing this trick.

Many of thought what can this trick will do as i say in above, This trick will make your computer welcome you on startup with the computerized voice. You can make your computer say anything you want.

So let's get Start-


2- This file should be somewhere in a hidden folder called AppData, so you have to enable “View hidden folders or just copy the address.

3- Go to C:\Documents and Settings\All Users\Start Menu\Programs\Startup (in Windows XP) and to C:\Users\ {User‐Name}\AppData\Roaming\Microsoft\Windows\Start Menu\Programs\Startup  {in Windows 8, Windows 7 and Windows Vista}

4- Just paste the file you downloaded on there.

5- By default your computer will show " weaponsarena.blogspot.com" to change this, you have to edit the file, just right click on the file and open it.

6- Change "weaponsarena.blogspot.com" to what you want.

7- Restart your computer and you will be able to see that your computer welcomes you.

All done please don't forget to share this.

Wednesday, 16 November 2016

How to Lock a Folder Using Code.


Hello friends, In this tutorial we will discuss on How to lock a folder without any software. Before starting this tutorial we must have the knowledge of how to create a folder and why folder privacy is important for us.  Today I tell you two simple methods to protect your folder. I hope that will you really enjoy this.

So lets get Start:-


METHOD FIRST

1)  Create a folder which you want to put your password.
2)  Open your notepad and paste the code in your notepad.

cls
@ECHO O
FF
title my Folder Private
if EXIST "Control Panel.{21EC2020-3AEA-1069-A2DD-08002B30309D}" goto UNLOCK if NOT EXIST Private goto MDLOCKER
:CONFIRM
echo Are you sure you want to lock the folder(Y/N) set/p "cho=>" if %cho%==Y goto LOCK if %cho%==y goto LOCK if %cho%==n goto END if %cho%==N goto END echo Invalid choice. goto CONFIRM :LOCK ren Private "Control Panel.{21EC2020-3AEA-1069-A2DD-08002B30309D}" attrib +h +s "Control Panel.{21EC2020-3AEA-1069-A2DD-08002B30309D}" echo Folder locked goto End :UNLOCK
echo Enter password to unlock folder set/p "pass=>"
if NOT %pass%== PASSWORD_COMES_HERE goto FAIL attrib -h -s "Control Panel.{21EC2020-3AEA-1069-A2DD-08002B30309D}" ren "Control Panel.{21EC2020-3AEA-1069-A2DD-08002B30309D}" Private echo Folder Unlocked successfully goto End :FAIL
echo Invalid password goto end :MDLOCKER
md Private
echo Private created successfully goto End :End


3) when you open your code in notepad put your password name and put password, see below image.

4)  when you put your folder name and password go to file and click on save as and put your file and name and put his extension (your folder name.bat) and save as file column put (All Files). See image.

5) Remember save your file in which place where you want to hide your personal data. Then close your notepad. And go your folder where you save your data, you see your bat file. Double click on it and you see a folder, put your data in your folder. See image.


6) When you put your data in folder, double click your bat folder and you see a window screen in front of you type here “y” and enter, you see your private folder is hidden, then go back on folder  and click on it and hide this folder no one see your personal folder and if anyone see your folder then he have to put password a password to open your private or personal folder.


All Done.

I will Post other methods later to lock Folder easily.

Please don't forget to Share. 
<

Tuesday, 15 November 2016

How To Download Instagram photos


Hello Friends Today i will tell you to download the Instagram Photos, many users ask me how to download the Instagram Photos. So i have found the method to download, but friends it is not so easy method. it is so difficult.

Before starting this tutorial we must have the knowledge of what is Instagram, Instagram is social networking site like Facebook, Twitter, Google Plus, LinkedIn etc. Instagram is a social mobile network site, where we share your Picture, video. Here you share your picture and video as publicly or privately. You also chat on Instagram. Instagram monthly users are 400 million active accounts on Instagram. Instagram global and United States rank is 19(June, 2016). 

So lets get started how to download Instagram photos.

In Instagram many people face download photos problem, today we will discuss how to download Instagram photos. It is very simple method to download Instagram pictures or photos. I hope that will you really enjoy this.

Step 1:- First visit Instagram official website and login in your Instagram account.


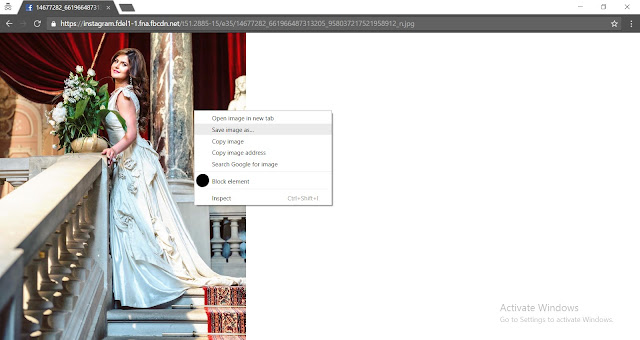
Step 2:- Select any picture which you want to download,Suppose i want this pic download, See below image. 

Step 3:- when you select the picture, go on URL link and delete link and press enter (see image).


Step 4:- When you delete the link and press enter, then right click on image and go view page source and shortcut key is Ctrl+ U.


Step 5:- when you click on view image source, a new tab open in your browser , go on this tab and press Ctrl+F and write jpg (see  image) then select the link of the image.


Step 6:- Just copy your link and paste in new tab. Now right click on your image and save your image.


All Done!!!

Here you learn very simple process to download Instagram photos. If you have any query related this topic, please let me know through your comment. And if you like my tutorial don’t forget to share my post. And you also follow me on Twitter and like my Facebook page.


How to Get More Followers on Twitter


Hello Everyone, I meet many followers who ever asked me how to get more followers on twitter. And I always said that the number of follower are not important for your twitter business page, important is how you have a unique followers who think about your tweet and what you explain on your tweet or pictures.  But if you want to get more followers on twitter, I will Tell You to increase your twitter followers.

In this tutorial I will guide you, how to get more followers on twitter. 

So let's Get Start.

First of all guys we must have the knowledge of twitter. Twitter is a big social network service where you share your pictures and write your limit short post. Twitter is one of the most developing or engaging social website at this time. Here you share your tweet as short message type. Here you send or read short tweet 140 character.  310 million active users use twitter account. One billion monthly unique visitors use twitter website in one month.  

Why We Want More Followers on Twitter

Many reason to want more followers on twitter, but today I will tell you three main reasons to want more followers.

Improve Your website Traffic:-  If you have more followers , you can attract on your website or improve you website Traffic and also improve your Business. If your tweet is unique or your post is good content always visit on your website and when users visit your website, then automatically increase your website traffic.

More Followers Make Good Impression:- 
Any visitor visit on your profile and he saw your number of followers it make a good impression on your business. People think you are expert on your business and he will take interest on your tweets. And 80% percent visitors follow you on twitter.

More Followers More People Trust :- 
when users visit our account and see your followers or number of tweets then user think he is perfect on his topic and he know  well about his topic. It makes a trust on your business page.

Here Some Tips for Twitter Users.


1- Attractive Profile Picture or Background:-  
As my experience,  you have to add attractive profile pictures or background related to your business page. Because when user visit your account and your profile or background are not attractive, then it make a negativity on user mind.

2- Follow more people:- 
Follow more people who interested in your business page. For example, suppose your twitter account related to marketing, and then follow whose people who interested in marketing.


3- Scheduled your tweet:- 
you have to choose one time, when you do tweet. If you not available to do tweets, then use tools who do post on your scheduled time.


4- Using Hashtag:- 
when you do tweet, please always keep in mind. Always use hashtag , it is improve your tweet. And increase your engagement of your tweets.

5- Give link on your tweet:- 
As we know that, twitter give us limited words, and we didn’t elaborate what I say in our tweet so it important to give a link on your tweet.

6- Always Retweet:-  
when you do tweet, and any user retweet on your tweets please must reply on his retweet. it increase 2 time more engagement on your twitter account.

7- Promote your twitter:-  
Promote your twitter account who interested  on your business  topics.


8- Always use your face:- 
Please use your real photo, no one see your brands logo anyone want a real person behind our brand.

These 8 method use in your twitter account and it help to increase the number of followers. And if you have any doubt please let me know through your comment. If you like this tutorial don’t forget to share on social.


Monday, 24 October 2016

How to Create Your Own Run Command


Hello everyone, There is no doubt that Microsoft Windows is the most widely used operating system in all parts of the world. Apart from being simple to use, it is quite rich in features as well, which makes our lives quite easy.

The Run command available on Windows operating system is one such power packed feature that lets you to open a document or an application instantly with the help of just 1 command. So, rather than clicking several icons or using multiple commands, you can use the Run command to open any program or document instantly. 

But, do you know how to create your own run commands? Well, it is really easy, which involves just few steps. Through this tutorial, I will help you understand how to access your favorite applications by creating custom Run commands.

So lets get start:-

Every one know how to Open Run Command?

Before I show you how to create your own Run commands, let’s take a quick look on how to open Run Command. First of all, you need to open the Run window by just pressing the Windows Key along with the R key, i.e. Windows + R. Now, you have to type the name of the program that you desire to open up or execute. Unfortunately, not all programs can be accessed through this method. So, let me show you how to create Run commands that do not come as inbuilt commands.

Step 1:-

The first step is to select the software or application for which you want to make custom Run command. For example, let us consider Google Chrome as the example here. Remember, you can choose any application other than which is already there in the Run command.

Step 2:-

In the second step, right click on the desktop of your computer system and make a new shortcut. 

Right click > New > Shortcut
As you can see on the picture.


Step 3:-

As you select the Shortcut option in the 2nd Step, it will open up a dialog box. And, the dialog box will ask you path of the application or software for which you want to create the Run command.

Step 4:-

Now, you need to browse through the files and choose the one that shows “chrome.exe”. Well, it is quite obvious that all the executable files can be found in the C drive (or wherever the Operating System has been installed), inside the folder “Program Files”. For example, “C:\Program Files\Google Chrome\chrome.exe.”

Step 5:-

Once you are done with Step number 4, just click on “Next” button and simply provide a relative name to that shortcut. Remember, the same name will be used later in the Run command.{For example, “GC” for Google Chrome}

Step 6:-

Now, click on the “Finish” button. Once it is done, an icon related to that application or software will show up on your computer’s screen. It means that the process of creating shortcut has been done successfully.

Step 7:-

In this step, just cut and paste that recently made shortcut icon into your computer’s root drive, in its Windows folder.

For example, C:\ Windows , Make sure you are the administrator of the computer or have its password.


Step 8:-

Now, you are done with the set up and can run the application through Run Command. Just go to Run and enter the keyword “GC”, and Google Chrome will begin executing.

All done!


How to Request or Assign a New IP Address


Hello everyone, you are trying to download, but the website will limit the download for your IP {once in 2 hours or 24 hours, it depends},this is a good trick if you want to avoid any limitation from any website.

So let get start,

1- Go to Start->Run.

2- Open CMD {it would be better if you start it as Admin}.

3- Enter those commands.
      ipconfig /flushdns
      ipconfig /release

      ipconfig /renew

4- Clean your cookies in the browser you are using.

In some moment you will be assigned in a new IP address. Notice, this method will not work if you have fixed IP. If you don’t have a fixed IP address and this method works, you may want to create a batch file and then run whenever you need to use those commands, it will save you time.

Note# Don’t forget to type ENTER after each line of the code. There are much more commands to write, but these are the most important and most used ones.

Wednesday, 19 October 2016

How to Use Your Smartphone As Mouse And Keyboard


Hello everyone, I Know some times you though that if you could use your Android Phone as mouse and keyboard for your computer, so don't worry there is no need to buy expensive equipments now. You can control your PC from your Android. To do this, you will need to install one software on your PC and a 15MB application.

So lets get start.

1- Start by downloading the Remote Keyboard for Android from Google Play.

2- Download the application for windows form here.

3- Make sure your computer/laptop and your Android Phone is connected in the same WiFi.

4- In your Android, you will see a device, which is your Windows System.

5- Your PC will display a code which you need to verify it by scanning with your Android Camera. If your devices pair with each other then you are good to go. for more follow the instructions on your application.


Notice- This trick will work only on computers/laptops which are Intel based systems.

How To Watch +18 Videos Without Signing In You Tube.


Hello everyone, everyone know about the youtube, youtube is a site of all types of videos it is like a Home TV you can watch or save anything you want, sometimes is very annoying when YouTube asks you to sign in for watching some qualified +18 videos. You may be in hurry and no time to sign in to open the video, this is why i will tell you a short steps. How to watch 18+ videos without logging in. This trick works without downloading any software, it’s just a simple URL trick.

So let get  starts.

1-  First get the URL of the video you want to watch.
       For example: www.youtube.com/watch?v=4Xkh6j7RMqk.

2- Copy the video ID. The ID of the link above is 4Xkh6j7RMqk.

3- Now what you have to do is, add that ID to the link below:

4- Replace the VideoId with the ID you got in step 2.

So the link will look like this:
www.youtube.com/v/4Xkh6j7RMqk?fs=1

All done, This is the fastest way to access 18+ videos on YouTube without having an account or signing in. It will save you some time, and there won’t be needed to loggin eveytime you want to see something that on YouTube is set as 18+ video which contains graphic language, pictures etc etc.

How to Delete Google+ Google Plus Account


Hello everyone, every one know about the gmail, whenever you make a new Gmail account you are given an option to get a Google+ account associated with it. You can see the new features in you account due to Google+.

Some people have more than one Gmail accounts but they want to have only one Google+ account. While some people don’t like it and they just want to get rid of it. So here , i will tell you 5 simple steps to remove Google+, if you make it by mistake or you get bored with it.

So, let get start.

Step 1-
Go to your Account->Account Preferences and click on “Delete profile and remove related Google+ features” at the bottom of the page.
You will be moved to a page which will ask you whether you want to delete only your Google+ profile or the whole Google Account.
Step 2-
Select the first option “Delete Google+ Content” as you want to delete only Google+ Account. Choosing this option you will not lose the other services of Google you use.

Step 3-
When you will click on the first option you will be shown a list of the things that will be done to your Google+ Profile and services related to Google. Now check “Required: I understand that deleting this service can’t be undone and the data I delete can’t be restored.” to be able to delete your profile.

Step 4-
Click on “Remove Selected Services”.

Step 5-
Now you will be moved to a page that will tell you that the deletion was successful. You will also be asked to tell the reason that you deleted it. Write the reason and click the submit button.

All done, your account is deleted and your page looks much different.

Monday, 10 October 2016

How to Convert Your Flash/Pen Drive Into RAM


Hello friends, i thought many of you have a old computers which don't have sufficient Ram as you want, and you could not do any thing that you want, also your computers getting so slow when you play big games or watch a HD films, So i made this tutorial for you people to make your your Pen-drive as Ram and enjoy every thing that you want.

This is a trick which will help you increase the speed of your computer, but the difference will be slightly. So let's get Start-

1-Insert a flash drive

2-Open up the Control Panel.

3-Go to “System.

4-Choose the advanced Tab.

5-In the Performances section, click on “Settings.”

6-Choose the advanced tab there.

7-In the “Virtual Memory” Section, press “Change.”

8-Select the letter corresponding to your flash drive. (Hint: It’s not C.) You can let the system manage the size or customize the amount of space that you want used as virtual memory. I’m not going to use this flash drive for anything else, so I’ll let the system manage it.

9-Make sure to Press Set once you’ve made your choice.

10-Press OK, and the changes will take effect.

11-Then restart your computer.

Done Your Pen-drive is ready as Ram and you can enjoy you films and games.

How to Use Advanced Search on Google


Hello everyone, tell me one thing, we use Google everytime, it’s the biggest search engine and liked by everyday users. But we don’t know much about it right? You see just an empty page with a search toolbar, but that’s not what Google is.

So to search on , is very easy but have you ever thought if there is something more than this? Everybody knows how to search on Google, you just write what you want and you are done.
In this simple tutorial i will show you how to do an advanced Google Search using some operators.

So let's get started:-

{link:}: What this operator does? It simply will show all the web pages that have links to a specified link.

{info} It will make Google show the information that has for a specified web page.

{inurl:} Google will restrict the results to documents containing that word in the url.

{related:} It will list the web pages that are similar to a web page.

{cache:} By writing this command, you will see how the web page was since the last time Google visited it.

Those are only some of the Google Operators, so when you use on of them, you need to remove [ ], for example, gathering info for my site, the operator will be, info: weaponsarena.blogspot.com

How to Turn Off Display Monitor


Hello everyone, I thought all of us know how to turn off a monitor, right? You can just simply press your monitor button or from your keyboard. I made this tutorial to tell you about a software which can be used to turn off your computer by setting a time or by keyboard shortcut.

With this program you can tell your monitor to run off immediately or set a time for it, and the program will start counting. This is a good one to make yourself go away from computer.

The best part is that you can also use command line interface to incorporate the utility into your own scipts. Or you can simply configure the keyboard shortcuts.


This is how the program will look like when you set a time to turn off your monitor. In order to save your work, you can also adjust the seconds that program needs to turn off your monitor when the time runs out.


And this is where you can configure your hotkey, it is very simple, just find the most comfortable hotkey which you can remember easily.

You can easily download this program form here dekisoft.


How you Play YouTube Videos in VLC Media Player


Hello everyone, when you have to watch videos you have know where you have to go the single {youtube} every one see the Pictures, videos in YouTube. But some time you are seeing your favorite film or video and there are so many {Ads} in that you have to cut it again and again and its come again and again, and your mood goes off to watch any thing. Today i will show you a diffrent way how to watch YouTube videos easily.

Every one the program is called VLC Media Player, i guess you have already installed it on your computer, it’s a good software. If not, you can download it from here its a official site of VLC media player.

After starting the trick we have to know some fact about VLC Media player.
So let's get started.

What is VLC Media Player?

“VLC Media Player is a third-party video player program for Windows, Linux, and Mac OS X that not only can play almost any type of video format but also provides additional functionality not available in Windows Media Player.”

Why Should You have to Use VLC To Watch YouTube Videos?

You can skip ads. When you watch Youtube videos through VLC, you skips the ads that you would otherwise see if watched via Youtube.com. Multitask. When you watch videos on YouTube it makes the multitasking very hard. 

You will be able to take screenshots of videos or record videos. VLC allows you to take a still snapshot of videos you watch, or record whole videos. While you can also take screenshots while watching Youtube via Youtube.com {the most easy way is to Print Screen} but VLC makes it easier, plus gives you the ability to record video.

Loop videos. You can easily loop a video on VLC media player.

Steps to Use VLC Media Player To Watch YouTube videos:

Step1- Copy the URL of the video you want to play on VLC media player.

Step2- Open VLC Media Player and type Ctrl+N, a new window will pop up (it’s shown in the picture below), add the URL that you copied in step1 in the browser space. Now just press Play and you are ready to go.

All done your video is ready to play and you can enjoy a lot off.