Showing posts with label Android Tricks. Show all posts

Friday, 7 December 2018

How To Use Link2SD License Patcher

Hello friends! How are you?

Today in this blog i will tell you how to use link2sd license patcher to patch link2sd app and get link2sd plus features for free.


As you know that link2sd app is very popular app for moving app data and linking app data from internal storage to your sd-card. It enables you to effectively manage your app and storage easily. You can do lot more things with link2sd app but problem is that some features are only available for link2sd plus user. So read the full post to know how to get link2sd plus for free.


License Patch For Link2SD Plus

Step 1 - First of all download official Link2SD app from playstore.

Step 2 - Now download Link2sd patcher and install it. 

Step 3 - Open Link2sd patcher app and go to patch menu and click on patch.


Step 4 - After applying patch reboot your device.

Step 5 - After reboot you can see message like 'patch applied successfully please activate'. Also you can see Link2sd plus icon in your app drawer. 

Step 6 - Now open that link2sd plus app and click on check license. At this time you will get error. Now close this app. 

Step 7 - Open patcher app and go to activate menu and click on activate. You will get successful message. 

Step 8 - Again open link2sd plus app and click on check license. This time your license will get verified. Now you can hide this plus icon by clicking on hide icon from app drawer. 

Step 9 - Now open original link2sd app which you have downloaded from playstore. You can see plus features are now unlocked. 


I hope this information will help you. 
If you have any queries then please do comment and let me know. 


THANK YOU. 
ENJOY... ENJOY... ENJOY... 


Saturday, 13 October 2018

Uninstall System apps from your device

Hello guys, most of the people are using smartphone now a days, when you buy a smartphone there are some pre-installed app come with your phone and you can't remove those app from your device weather you like those app or not.


Many people wants to remove those unnecessary app because they keep eating your device memory. so here is trick by that you can remove those app permanently or temporarily.


#Requirements:

1 - rooted device
2 - ES file explorer

Step 1 - Download ES File explorer click here

Step 2 - go to /device

Step 3 -  Now go to system folder.

Step 4 - In system folder you can see two folder like " apps" and " priv-apps" . The app which you want to be uninstall will be in one of these two folder so find it.

Step 5 - Now after finding that app you can remove this app permanently or temporarily.
To remove app permanently just delete that app from that folder.


To remove app temporarily you can rename the app
For example : I want to remove gallery app , so I rename the app from " gallery2.apk " to " gallery2.apk.bak " and save it. So your app will be removed from your device and when you want it back you can rename it to original name.


I hope this information will help you.
Enjoy...enjoy...enjoy...

Thursday, 11 October 2018

DEVICE ID CHANGER APPS FOR ANDROID

Hello friends in this blog I am going to list out the best device ID changer apps for your android.


There are to many apps available for changing your device ID (IMEI changing, serial number, Mac address changing etc...). But today I will tell you three best app which I personally used for changing my device ID's.


No. 1 - Device ID changer pro(xposed)

To download - click here
In our list first app is device ID changer pro which is xposed module and allow you to change some ID's like
- IMEI
- Android id
- advertising id
- serial number
- Bluetooth Mac
- WiFi Mac
- WiFi SSID

To use this app you required xposed framework installed on your device. You can download this app xposed app and also from play store.

Disadvantages: after changing ID's you have to reboot your device in order to apply that changes which is very irritating.


No. 2 - Android device changer(xposed)

To download - click here
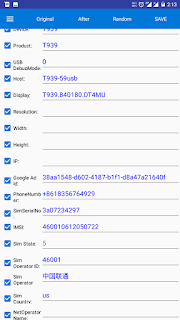
Android device ID changer app is on number two in our list which provides you to many id changing options.You can see those in screen shot below.

Advantage: unlike our first app we don't required to reboot our device in order to apply changes.but we have to specify the app for which we want to change our ID's.


Note: in our first app when apply changes and reboot our device, after reboot it will change the entire device IDs but in case of second app it will change the ID's of selected apps.

No. 3 - xprivacy(xposed)
To download - click here
Xprivacy is on number three, actually this app is not change your ID's like above apps but it will restrict the app to get your original IDs. By using this xposed module you can restrict your apps to access your location, identification,storage, accounts etc...

Also you can provide fake ID's to your selected app by going to setting option and then click on rendomize data.


I hope this information will help you...
Enjoy...enjoy...enjoy...


Wednesday, 10 October 2018

INSTALL MODDED PLAY STORE ON ANDROID


Modded play store is the modified version of google play store which is same to original app but have some advantages like..


#advantages

1 - when we download paid app from sites (not from play store) and after installing that app when we open that app some times we get error like " licence not found ". It is because of google play check and verify licence of that installed app and as we don't have licence we can't use that app but if we have modded play store then it will verify the licence and we can use that app.

2 - suppose you have purchase and install paid app from original play store and now you want refund then within 2 hours of installation you can get refund and your app will be uninstalled. But in case of modded play store you get refund within 2 hours of installation without uninstalling that app.


Note - you can't download paid apps free from modded play store.

#install modded play store

#requirement:

1 - rooted Android 
2 - lucky patcher app

Step 1 - install and open lucky patcher

Note: before we proceed make sure that you have backup of original play store in case we have to restore it.(for safety)

Step 2 - grant root permission to lucky patcher
Step 3 - go to toolbox ( at bottom of screen)
Step 4 - go to patch to android and select first two option , i.e. signature verification status always true , disable .apk signature verification
Step 5 - now click on apply and reboot your device.


Step 6 - now again go to patch to Android and see Weather the patch is applied or not ( if not repeat step 4 )
Step 7 - after successful applying patch go to install modded play store and select version you want to install.
Step 8 - install and reboot your device

Now you have successfully installed modded play store


In case if you got error then restore original play store which you have backup previously.

I hope this information will help you.
Enjoy...enjoy...enjoy...


HOW TO ADD MORE THAN 5 MULTIUSER IN ANDROID

Android support the multiple user on single android device by seperating user account and application data.


#Multi-user support

Multi-user feature is supported in android Lollipop (5.0) and later  android versions.


#Types of user

1 - primary user (admin)
2 - secondary user
3 - guest user

By default android support maximum five multi-user on single device including guest user.

Note: you can't remove guest user

So if you want to use more then one user account then you can create multiple user accounts maximum upto five (default) like,
Primary user , user-1 , user-2 , user-3 , guest

Now if you want to create user-4 then you can't because there is already five user account.
So if you want to increase this limit to create more than five account then follow below steps...

#Requirement:

1 - rooted Android (OS 5.0+)
2 - text editor

Here we are using build.prop trick to support more than 5 multi-user.

Step 1 - go to device/system/build.prop
Step 2 - open build.prop and add following two lines
              fw.max_users=10 
              fw.show_multiuserui=1

Here in first line 10 is number of multi-user you want. you can change it as per your wish.

Step 3 - now save and reboot

I hope this post is helpful to you...
Enjoy...enjoy...enjoy...