Showing posts with label walkthrough. Show all posts

Thursday, 3 September 2015

The complete hacking guidebook to zANTI2 is here!

zANTI2 is one of the most powerful tools for penetration testing on Android devices. Sadly, there are not many ways to learn about its mighty functions, thus many useful things are left undiscovered. Well, not anymore. A brand new guidebook to Android penetration testing is here!

Learning zANTI2 for Android Pentesting shows how to dive into the world of advanced network penetration tests to survey and attack wireless networks using your Android device and zANTI2, understand the basics of wireless penetration testing, learn advanced scanning techniques, discover remotely exploitable vulnerabilities, attack and hijack passwords/accounts using the MITM attack and many, many more!

The book is intended for those who want to know more about network penetration tests and have no prior experience, as well as for those who are experienced in network systems and are curious to discover more about this topic. Since zANTI2 features an extremely intuitive and easy to control interface, it doesn't require any special skills.


Interested? Head to Packtpub.com and find out more! - LINK

Thursday, 30 July 2015

Stagefright vulnerability affects 95% of all Android devices - Protect yourself!

A security company standing behind the zANTI application - Zimperium, has recently discovered a new vulnerability called Stagefright. This new security flaw affects roughly 95% of all Android devices running Android 2.2 all the way to Android 5.1.1 Lollipop. And how to project yourself from it?

Stagefright is an Android media library and is now widely used - even in the newest Android versions. This means your device is probably vulnerable to this security flaw.

The vulnerability can be easily exploited by sending a special MMS from the attacker's phone. This means that basically anyone who knows your telephone number can attack your phone. What's also a dangerous sign is that an attacker can send you a message while you're asleep and freely browse and run arbitrary code on your device with you having no idea about it.


The only way to potentially protect yourself from this vulnerability till the official Android update is released is to disable auto fetching for MMS. This will stop automatically downloading MMS messages as they arrive, thus an attacker would have no way of accessing your phone.


Be sure Auto-retrieve is disabled. If you're using Hangouts or stock messaging app, ensure this option is disabled on both applications.


Source: Zimperium blog

Monday, 8 June 2015

How To Install Android M's new vertical app drawer!

Android M has revelaed a fine amount of new features, including the new vercial-scrolling app drawer in Google Launcher. Some don't like it, some do - here's how to get it on your non-Nexus device as well!

The whole procedure is really easy and simple, all you got to do is to update the Google App to the newest version and of course, install the Google Launcher from Google Play Store.


  1. Download the launcher, if you haven't already. (https://play.google.com/store/apps/details?id=com.google.android.launcher&hl=cs)
  2. Set as your default home, download and install the newest Google App - download (be sure to have unknown sources enabled to install apps that come outside of Google Play Store
Done? Your launcher should reset now. After that, you should see the new app drawer.


Personally, I like the change. Vertical scrolling list can quickly get you to the very bottom, a search option has also been added with a top bar showing recently launcher apps. What do you think?


Friday, 29 May 2015

How to enable MultiWindow on Android Marshmallow!

Boooom! Android M preview is out. For those that already flashed it, there might be a really really cool thing for you to try. In fact, Android M comes with multiwindow. It's experimental but seems to be working. Let's try it out!

  1. Firstly, boot into recovery. Be sure to have a custom recovery, TWRP works the best.
  2. Be sure the /system partition is mounted (Go to mount -> mount the system)
  3. Connect your device to your PC, be sure to have your device recognizable by ADB, type adb devices - your device should pop up. (Don't have ADB? Download here!)
  4. Let's access the build.prop, type the following commands in to the terminal:
adb shell
cd /system
vi build.prop

Let's change a line to enable userdebug mode. Change the line:

ro.build.type=user
to
ro.build.type=userdebug

Reboot your phone. Navigate to developer options in settings (to enable dev options, go to "about phone" and tap on "build number" several times).

Open recents and boom, you have it.


Saturday, 9 May 2015

Unresponsive touchscreen FIX for OnePlus One!

Several OnePlus One users have reported this rather annoying glitch when screen becomes unresponsive after a while. Everything seems to be working fine exepct the touchscreen, which stays unresponsive and the only way to fix this is to reboot the device. If you're experiencing such issues, here's a fix for you!

The solution is only temporary and users will probably have to wait for another software update fixing this issue but it seems to be working just fine.

The key to fix this is executing the following command into the terminal:
cat /sys/class/input/input0/baseline_test

To make this automated, you can use Tasker and create this specific task for command execution every time the screen turns ON.

Open Tasker, add a new profile, navigate to state -> display -> display state, choose ON, then create a new task.

Add an action code -> run shell and input the command cat /sys/class/input/input0/baseline_test which will be executed when the screen turns ON. Make sure root option is ticked and profile with the task is activated. You're good to go!

You might want to check the quick video by +Greg Ives if you're unsure about the guide.
https://plus.google.com/+GregIvesgrives/posts/g1hWuhdEyNx


Don't have Tasker? You might consider buying it! Tasker adds automatic tasks (that you create), events, triggers, whatever you don't want to do manually anymore, Tasker will do for you!

Download Tasker on Google Play

Friday, 27 March 2015

How to enable LG's Quick Remote on custom AOSP-based ROMs?

Devices like LG G2 and G3 are equipped with an IR blaster which is very useful for controlling devices such TVs, projectors, radios, set-top boxes or even air conditioners. Unfortunately, the IR blaster and the QuickRemote app itself worked on the stock ROM (and custom ROMs based on this stock version, such as CandyG3) and if you wanted to flash an AOSP-based ROM, you had to live with the fact that the QuickRemote will not work. Well, not anymore.

The "guys from the XDA", exactly sefnap, RieGo and zzeneg have ported the QuickRemote app for LG G2 and G3 and made it working on all AOSP based ROMs.

The default SELinux policy for android was changed to enforcing mode in Lollipop to increase security. This restricts the functionality of some apps, so for QuickRemote to work we have to change the SELinux policy back to permissive mode until we have a better solution.

Instructions? Classic; just flasth the ZIP. Don't forget to make a backup, or at least download the uninstall version zip (that will remove the mod once flashed).

First make sure the init.d support is enabled, you can use this app.


Sunday, 8 March 2015

How to get apps from Google Play for free using Cracked Google Play

This walkthrough is for educational purposes only. Please do not abuse this knowledge.

To get apps directly from Google Play for free, we need a few things first:


  • root access (with Busybox installed)
  • Cracked Google Play
  • root browser
  • a credit card we'll be using to purchase apps
Cracked Google Play from ChelpuS is a modyfied version of Google Play that has a few little improvements over the stock one.

With the modded Play Store, you can : Use protected apps with Google LVL (License Verification Library) without cracking them, verify license in offline mode, disable self update, and more.

One of the features we'll be exploting is that with Cracked google Play is refunds. Refunds work like this: You buy an app and you decide that you don't wont it (let's say it's crashing on your device). What you do, is that you hit refund and bom, your money is back. Of course the app you've bought gets uninstall. Well, not with cracked version.

In the modified GPlay version, the app stays on your device even when you refunded it. This way, you've just gotten it for free. However, you'll have to buy it first.


Install cracked Google Play

First you need to install this modified version. You can't install it as a classic APK file because GPlay is a system app, not a user app. So for installing you'll have to replace it in /system directory.


  1. Download root browser
  2. Download cracked Google Play apk
  3. Open the root browser, navigate to /system directory and find the Google Play app there. Note the directory may vary in different Android versions. In older ones it's probably somewhere in /system/app directory, if you're running newer versions it might be in /system/priv-app/Phonesky/Phonesky.apk - I'll be using this example.
  4. Rename the downloaded file (cracked version of Google Play) to Phonesky.apk (i.e to the same name as the stock GPlay version) and replace it in the directory. It is recommended to backup the stock GPlay version in case the cracked one doesn't work.
  5. Change the permissions of the app. Hold your finger on the APK file, hit change permissions and change it to rw-r-r-
  6. Reboot.
Now you have the cracked Google Play version installed on your device. What next?


Buy an app

Simply buy the app. Everything will go as expected, your money will be sent to the developer. We're halfway done.

Refund the app

Next step? Refund. Go to Google Play, find the app and hit refund button right next to Open button. Your money will be refunded but the app you bought stays. boom!


Well, that's pretty much it. Please note that this walkthrough is for educational purposes only - support developers by giving them money. Only this way they can produce better applications for all.


Tuesday, 3 March 2015

How to fix: Google Now can't be opened - Network error

Network error. Check your network connections and try again. That's what I got after opening Google Now settings. I haven't modyfied my Google account in any way, everything seemed fine. Then this. All of a sudden. Luckily I've found a fix to this!

I could not access Google Now on my account anywhere on my devices. It just didn't work. I tried to remove Google Search app data, cache, even tried to reinstall the app and whole system.


Fortunately, it's not the problem. You don't have to delete any of your data. If you're having this issue, there's an easy fix for that.


  1. Open Google Settings app from your drawer.
  2. Open the account history tab.
  3. Turn everything OFF.
  4. Wait a few minutes and then turn it back ON.
  5. That's all! Your Google Now should be setup properly now.
Screenshot 2015 03 03 17 23 47

I still don't know what caused the problem but this easily fixed it. Hope that helped you as well!

Monday, 9 February 2015

NO ROOT - Disable "Knock Knock" on your LG device and get more battery life!

I was playing with my G3 and discovered a way to disable the Knock Knock feature which helps the user enable the screen without even touching hardware buttons just by double tapping the screen.
I don't use this feature very often, so I decided to disable it. Guess what, my battery life is now more amazing than ever before!

No, you don't need to be rooted to disable the Knock Knock feature. It's pretty easy. All you need to do is to access the hidden menu on your LG device and simply disable it.

To open up the hidden menu, open your Dialer app all input this number (according to your carrier/version):


  • 3845#*855# (for International model)
  • 3845#*851# (for T-Mobile)
  • 3845#*850# (fot AT&T)
While you type the last digit, the hidden menu will appear. What's next? Scroll down till you see the Knock On/off setting and just disable the function. And viola, here you have it!

I was really surprised when I got 70% with my full day of usage on LTE. I usually end my day at about 50% so it seems to pump up the battery life a bit.

Enjoy!

Friday, 30 January 2015

Tutorial - How To Use zANTI2 for hacking?

zANTI2 is a new app that came from the Zimperium and Simone Margaritelli, the dSploit author. zANTI comes with a bunch of amazing features, including metasploit exploits, packets sniffing, session and password hijacking and many more. But how do you use them? See this tutorial!

Ready to hack? Let's go.


First off, (if you haven't already), download the zANTI app from dsploit.net
You can register if you want and you're good to go.

Alright, now connect to the WiFi and start scanning.

Screenshot 2015 01 29 10 06 34Screenshot 2015 01 29 10 07 15

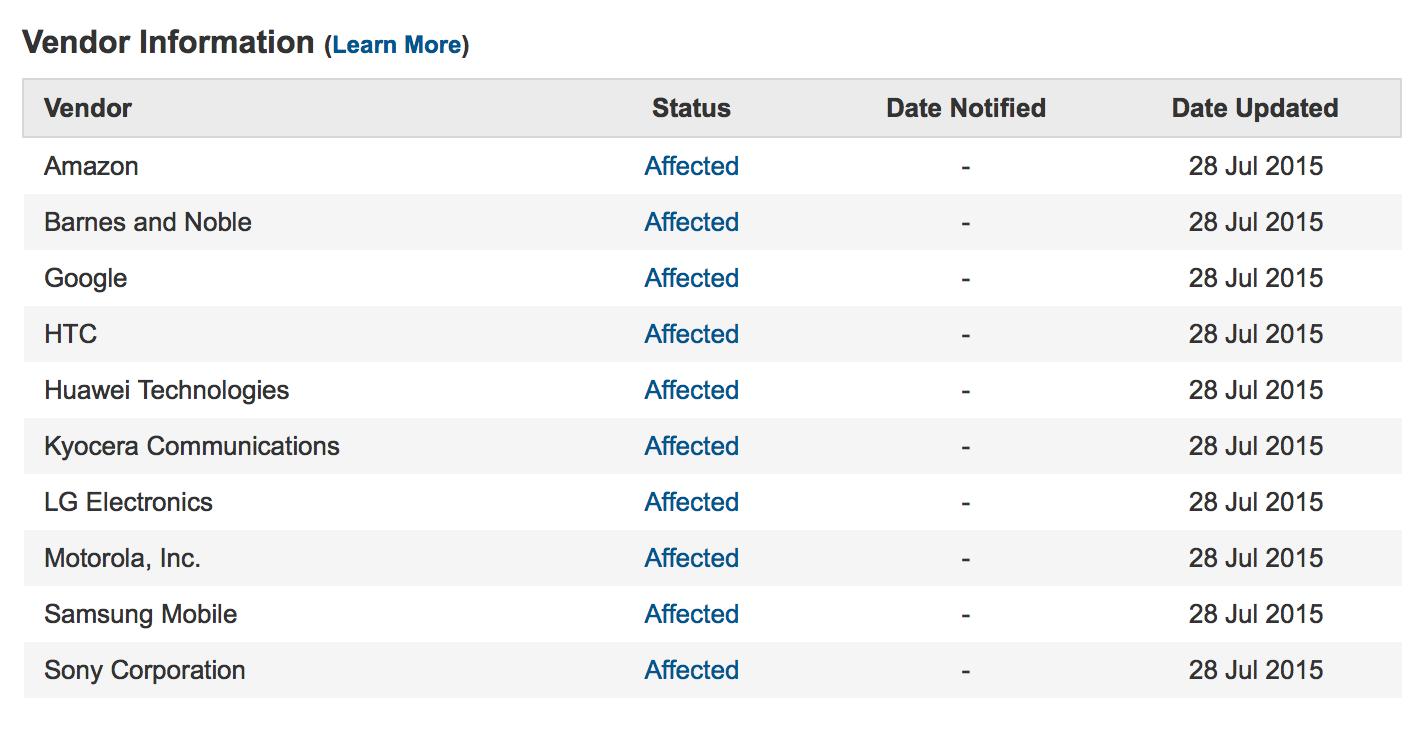
Wait for the scan to be finished. You will see connected devices with open ports. As you can see on the image above, there are a few devices including one HTC device running Linux (Android) and two printers.

You can now choose which of the devices you want to attack. I will go ahead and select the HTC. If you want to attack all of them, you can select the entire network.

If you open up the device, you'll see a few options popping up.


  • Scan
  • Connect to remote port
  • Password complexity audit
  • MITM
  • Vunlerabilities check (shellshock, SSL poodle)
Let's explain them. The scan option will perform another, more advanced scan on the target. You can specify the typea of scan and it will be more accurate on the target.

Connect to remote port is a very interesting option that lets the attacker connect to the open port and estabilish the connection to the victim. If you open up this option, you will see the available ports. In most cases, it would be 80, that is HTTP port. However, there can be more ports available. For example, I attempted to connect to my laptop - I have a password on it, if I didn't have any password set on my laptop, I could easily view everything available in the C:/ drive - pictures, folders, files and many more. Really cool, really spooky; conclusion - secure your laptop with a password, even if there's nobody you know that could possibly break into your device.

We're not done with this option, it brings much more stuff when there is a vunlerability that can be exploited on the victim's PC.


I've found this nice video by Adam Alio demonstrating the power of Zetasploit. He exploits a vulnerability in the victim's PC that allows to connect to remote host via VNC - the virtual network computing, a graphical desktop sharing system that allows to connect to monitor and control your PC using your Android phone, just like as you were running Windows XP.


Then he ran a Cloud exploit and connected to the console. He then took power over the computer and shut it down using shutdown command. Pretty nice and pretty easy. Also pretty scary, isn't it?


Let's skip the password complexity audit and jump right into the MITM section, which will be the most interesting one. MITM stands for man in the middle and what this basically means, is that by triggering an MITM attack, all the traffic goes through your device (you are becoming the man in the middle), thus you can easily view and modify the traffic requests.

To perform this MITM attack, simply select the target and then tap on "Man in the middle" button. A new tab will pop up.

Screenshot 2015 01 30 18 45 59

Firstly, choose which functions do you want to enable during the MITM attack. There is a SSL Strip option, which is very important because it removes the HTTPS protocol by redirecting it to a HTTP. You will not be able to hijack a session when there is a HTTPS protocol so SSL Strip is essential for hacking accounts.

SSL Strip cannot redirect a direct HTTPS, only when victim goes from HTTP to HTTPS. Means that if a victim opens up Facebook (which is HTTPS), SSL Strip will not work as there is a direct request to a HTTPS protocol. I suggest you keeping this enabled the entire time hacking.

Redirect HTTP - 
This option redirects a website to another one. Simply choose the URL and enable the function.¨

Replace images -
Choose an image which will be replaced with all the images your victim browses through.

Capture download - 
Choose which types you want to capture and enable the function to save all the files your victim downloads. You can also Intercept download by pushing another file to the victim.


Enable the MITM and wait a few whiles. If your victim doesn't use the net (web traffic), you'll have to wait till he/she opens up a browser, downloads a file or just use the network. If everything goes right, a little window saying "IP is vulnerable to MITM attack [or something like that]" should pop up. This means your victim is vunlerable to sniffing, session and password hijacking and many more functions zANTI has to offer.

To see what your victim browses through, see the "logged requests" option. You can also see logged images.

Screenshot 2015 01 30 18 48 59

Image above shows logged requests, you can hijack the session by tapping on one of the requests.


To allow each HTTP request individually, use the zPacketEditor. By swyping to the left, you can easily modify the request and send it to the victim.


Alright, now you should know the basics of MITM spoofing attacks, have fun playing!
Just one more thing, always be responsible for what you're doing, don't share private stuff of your victims, After all, it is not that difficult to find out the spoofer across the network.


Saturday, 24 January 2015

NO ROOT - How to remove UI lags on LG G3

LG's flagship, the G3, is really a stunning phone. Many people know this device mostly because of its shocking 2K display and with extreme high dpi but there are a few glitches because of this. This 2K display is really hard to handle and the powerful Snapdragon CPU clocked at 2.5Ghz may heat up a bit when playing some high-end 3D games, for example. And this is the main reason of UI lags you've probably experienced when you got the phone.
The lags are no big, just tiny little hiccups when the phone gets overheated. And why's that?
Well, the main cause of this is High temperature property and Thermal daemon mitigation.

What these two function do, is that they pump fown the FPS a touch to protect the phone from overheating and cool it down. It's not a bad idea but sometimes it may get a bit annoying when the power is really needed.

If you're a G3 user but don't have your phone rooted, nevermind! This time root access will not be needed.

  1. Access hidden menu on your G3.
To open hidden menu, open the dialer app input one of these numbers (that matches your carrier).
After you type the last digit, hidden menu will open on its own. If you're using Verizon carrier, you'll have to call the number.

3845#*855# (for International model)
3845#*851# (for T-Mobile)
3845#*850# (fot AT&T)
##228378 - Verizon

After you successfully opened the hidden menu, scroll down till you see High Temperature Property OFF and turn it ON. Enabling this will disable the high temperature property.

We're not done yet, scroll down a bit more till you see Daemon Mitigation OFF and again, enable it to turn this function off.

Now, reboot your G3. You're done.


Warning:
Disabling these function will no longer turn the brightness down when the device gets overheated so beware when streaming or doing stuff with high brightness.


Have fun!

Thursday, 15 January 2015

How to enable stereo surroud sound on Nexus 5?

Nexus 5, the ex-flagship from Google. Unfortunately, it doesn't come with the real stereo sound but we can change that. It's really easy!
Root required

If you play media, music, videos or whatever uses the speaker, it plays only via the only speaker at the bottom. What this mod does, is that it enables all the speakers including ear piece speaker and thus enables the real surround sound for your device.

And how to install it? Well, it's actually pretty simple. The only thing you have to do is to flash a ZIP file in recovery. 


What more to say, just enjoy your upgraded sound!

(If you don't like the changes, you can revert back by flashing this ZIP).


Monday, 12 January 2015

How to speed up YouTube player on Android?

Nothing is more annoying than seeing that little loading bar for ages and waiting till the video finally loads. Well, not anymore! Here's a handy walkthrough of how to speed up YouTube on Android by enabling the ExoPlayer!

Root required


Alright, let's get to it!


  1. Firstly, head over to the Youtube app settings and force stop it. You can also clear its data to avoid possible problems.
  2. Download/open a root browser and navigate to /data/data/com.google.android.youtube
  3. Open the file called shared_prefs
  4. Now, open the youtube.xml in a text editor of the app you're using.
  5. There's a <map> element right after the <xml version>and encoding information.
Copy these lines and past them below the <map> tag.


<string name="exo_player_activation_type">ADAPTIVE</string>
<boolean name="exo_player_cache" value="true"/>
<boolean name="show_exo_player_debzg_messages" value="true"/>

Be sure to save the file. Then go back to Youtube app settings and force close it again to take the effect. And you're done!

A toast message "Using ExoPlayer" should appear if you attempt to play a video on YouTube. That way you'll know the ExoPlayer fully works. Buffering especially HD/FULLHD videos should be much faster than before. Feel free to leave a feedback!


Be sure to have at least youtube,xml file backup before editing system files.

Saturday, 10 January 2015

How to hack Android device using Metasploit

I've got in touch with Metasploit framework, the well-known software for penetration tests (in other words, hacking) and whatnot. You can do a lot of funky stuff with it, here's a quick way to exploit an Android device using it.

For educational purposes only.

To do this, you'll need a Metasploit Framework (you can use Kali Linux as a workspace).
Basically what you do, is that you create a backdoor APK file and send it to the device. The victim then opens and installs the file.

What happens next is that Metasploit starts a reverse handler along with a payload handler. It estabilishes the connection and launches Meterpreter. Meterpreter is a powerful tool with a plenty of awesome functions. Let's check some of them right in the beginning.


  • shell
As the command suggest, this will launch the shell on the target. If the victim uses a Linux-based system, like Android, and it's rooted, you can easily take full control over the device. Using commands like su, rm /system and others will brick the device right away.

  • webcam_list
This command returns a list of all available webcams on the target.

  • webcam_snap
Takes a picture from the target and saves it to your disc (to your current workspace by default).


There are many more commands in Meterpreter, check HERE.


Back to hackz.

What we do next is the execution of msfpayload reverse_tcp with LHOST and finally creating an APK file. When the APK file is created, we can send it to the victim or arrange it somewhere, spread it to the world and whatanot.

Then we do some more funky stuff and start the meterpreter session.
By using sessions command, we can view active sessions (victim x attacker).

Using the command sesssion -i [number of session] we open the active session and start using the meterpreter  command listed above. Pretty easy!

And here's a quick YouTube video I found. Check it out for more information. Happy hacking!