Sunday, 20 November 2016

How to Hack WiFi Password On Android


Hello everyone, How are you friends, Many of you have seen tutorials on internet about how to hack wifi using Android. but the real truth is that most of them don’t work. Today i will tell you the good tool to hack wifi. Some of the hacking tutorials require you to download big files or suspicous files, but this application i am writing about is only 3.5MB.

There is the one question on your mind that, What do you need for this?
So, don't need to worry about that you want only  An Android mobile. 
And the Application Android Version 5.0 (lollipop) and above, for better results.

Note# This application may not work with all routers. It also depends how strong the password is.

Notice: We are not responsible for what you do, do it at your own risk, this is just for tutorial purposes.

So let's get start This tutorial.

Step 1#
First, you need to download the application from Google Store.


Step 2#
Just run the application and it will start searching for available networks in your area.

Step 3#
If available networks are available, the application will tell you if the WiFi is hackable or not. You can see this on the right of the WiFi name, if the lock is with green color means that the WiFi password is hackable, if it’s red then you will not be able to hack it.

Step 4#
After checking if the WiFi password is hackable , to get your password you just need to tap on the WiFi Name.

Step 5#
A new window will pop up, which will tell you if you want to proceed or not. Just click CONNECT.

Step 5#
Next, it will ask you if you want to chose the ROOT Method or NO ROOT Method {You will choose the NO ROOT Option}

Step 6#
A new window will pop up, it will ask you to choose on of the available pins, just select a PIN and tap on CONNECT (ROOT).

Step 7#
Now the application that uses 5 diffrent algorithms to find the correct password, will take some seconds to get the password of your WiFi {it depends on the WiFi password}.

Step 8#
The next window that will pop up, is your password. Just copy it and you are ready to connect on your chosen WiFi connection.

If your password is not available you have to go back at step 6 and choose another PIN.

All done, if you have better method so please don't forget to comment it below or you have liked my tutorial so don't forget to like on us facebook or share my post.

Saturday, 19 November 2016

Download and Install Windows Cursors


Hello everyone, how are you Today i am discuss about the Mouse cursors. mouse cursors can be changed very easily. Even if you are a beginner or a professional computer user. You can change your default mouse cursor and add a new one, customized by you or download some for free.You can change as many cursors as you want, there is no need to change all available cursors. There are a hundred of different cursors available in your computer, so it would take you a lot of time.

There are many websites that will offer you free mouse cursors, but keep in mind, there are two kind of cursors. Windows system supports two types of cursors: the static one and the animated one. It depends how you want your mouse cursor to be.

So let's get start To change your mouse cursors.

1-  Open this website to download the cursors. You can find many other websites that offer awesome cursors it depends on you.

2- After downloading the files, you will see a folder with all available cursor you can choose from. If you want you can use them all, if you want just change the basic one.

3- Go to Personalization->Settings->Mouse pointer settings by right clicking on your desktop. This option is for Windows 10, if your windows is other version ,Windows try finding it by using the search method

4- It will open a new tab, which will show you the default points and the properties.

5- To change your cursor theme, just click on the one which you want to change and click on Browse.

6- Choose the customized cursor you downloaded from the above website and click Apply.

All done!!

Please don't forget to share if you like my tutorial and follow me also.

Wednesday, 16 November 2016

More Than 200 Keyboard Shortcut Keys

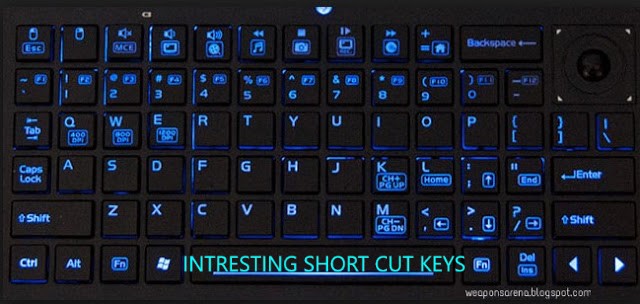
Hello everyone, I will back again Today we will discuss on computer shortcut keys which is help to work on computer system. When you work on computer in any program shortcut keys always help to do easy work. In this post you will learn about some basic computer shortcut keys. I hope that will you really enjoy this.

So let's Get Start.


NUMERICAL SHORTCUT KEYS

CTRL+1:- FORMET CELL DIALOG BOX
CTRL+2:-BOLD
CTRL+3:- ITALIC
CTRL+4:-UNDERLINE
CTRL+5:- REMOVE STRIKETHROUGH
CTRL+6:- SHOWN OR HIDE OBJECT
CTRL+7:- SHOWN OR HIDE TOOLBAR
CTRL+8:- TOOGLE OUTLINE SYMBOLS
CTRL+9:- HIDE ROWS

GENERAL SHORTCUT KEYS 


CTRL+A:- SELECT ALL
CTRL+B:- BOLD
CTRL+C:- COPY
CTRL+D:- FILL DOWN
CTRL+E:- ALIGNMENT CENTER
CTRL+F:- FIND
CTRL+G:- GO TO 
CTRL+H:- REPLACE 
CTRL+I:- ITALIC
CTRL+J:- JUSTIFY OR ENTER( IN NOTEPAD)
CTRL+K:-INSERT HYPERLINK
CTRL+L:- CREATE LIST
CTRL+M:- ENTER (IN NOTEPAD)
CTRL+N:-  NEW WORKBOOK
CTRL+O:- OPEN 
CTRL+P:- PRINT
CTRL+Q:- QUIT
CTRL+R:- FILL RIGHT
CTRL+S:- SAVE 
CTRL+T:- NEW TAB OPEN
CTRL+U:- UNDERLINE
CTRL+V:- PASTE
CTRL+W:- CLOSE
CTRL+X:- CUT
CTRL+Y:- REPEAT
CTRL+Z:- UNDO


 SHIFT FUNCTION KEYS


SHIFT+F1:- WHAT’S THIS?
SHIFT+F2:- EDIT COMMENT IN CELL (IN EXCEL)
SHIFT+F3:- PASTE FORMULA
SHIFT+F4:- NEXT FIND 
SHIFT+F5:- FIND
SHIFT+F6:- PANE PREVIOUS
SHIFT+F7:- OPEN THEASURES
SHIFT+F8:- ADD SELECTION
SHIFT+F9:- CALCULATE ACTIVE WORKSHEET

 FUNCTION SHORTCUT KEYS


F1:- HELP
F2:- EDIT
F3:- PASTE NAME
F4:- REPEAT PREVIOUS STEP OR LOCK FORMULA IN EXCEL
F5:- GO TO 
F6:- NEXT PANE
F7:- SPELL CHECK
F8:- EXTEND NAME
F9:-  WORKBOOK RECALCULATE
F10:- ACTIVATE MENUBAR
F11:- NEW CHART
F12:- SAVE AS

 ALT  CURRENCY SPECIAL CHARACTER 

ALT+ 0128:- EURO CURRENCY SYMBOL(€)
ALT+ 0162:- CENT SYMBOL(¢)
ALT+ 0163:- BRITISH CURRENCY SYMBOL(£)
ALT+ 20B9:- INDIAN CURRENCY SYMBOL(₹)


NOTE:- In Indian rupees symbol, first type 20B9 then select the text and then press ALT+X. 


 ALTERNATE SHORTCUT KEYS

ALT+F1:-  INSERT CHART
ALT+F2:-SAVE AS
ALT+F3:-
ALT+F4:- EXIT TO CURRENT PROGRAM
ALT+F5:-NOT AVAILABLE
ALT+F6:- NOT AVAILABLE
ALT+F7:- NOT AVAILABLE
ALT+F8:- MACRO DIALOG BOX
ALT+F9:- NOT AVAILABLE
ALT+F10:- NOT AVAILABLE
ALT+F11:- VBA(VISUAL BASIC EDITOR) WORK IN EXCEL 
ALT+F12:-NOT AVAILABLE


 Keyboard Shortcuts For Windows :

1. CTRL+C (Copy)

2. CTRL+X (Cut)

3. CTRL+V (Paste)

4. CTRL+Z (Undo)

5. DELETE (Delete)

6. SHIFT+DELETE (Delete the selected item permanently without placing the item in the Recycle Bin)

7. CTRL while dragging an item (Copy the selected item)

8. CTRL+SHIFT while dragging an item (Create a shortcut to the selected item)

9. F2 key (Rename the selected item)

10. CTRL+RIGHT ARROW (Move the insertion point to the beginning of the next word)

11. CTRL+LEFT ARROW (Move the insertion point to the beginning of the previous word)

12. CTRL+DOWN ARROW (Move the insertion point to the beginning of the next paragraph)

13. CTRL+UP ARROW (Move the insertion point to the beginning of the previous paragraph)

14. CTRL+SHIFT with any of the arrow keys (Highlight a block of text)SHIFT with any of the arrow keys (Select more than one item in a window or on the desktop, or select text in a document)

15. CTRL+A (Select all)

16. F3 key (Search for a file or a folder)

17. ALT+ENTER (View the properties for the selected item)

18. ALT+F4 (Close the active item, or quit the active program)

19. ALT+ENTER (Display the properties of the selected object)

20. ALT+SPACEBAR (Open the shortcut menu for the active window)

21. CTRL+F4 (Close the active document in programs that enable you to have multiple documents open simultaneously)

22. ALT+TAB (Switch between the open items)

23. ALT+ESC (Cycle through items in the order that they had been opened)

24. F6 key (Cycle through the screen elements in a window or on the desktop)

25. F4 key (Display the Address bar list in My Computer or Windows Explorer)

26. SHIFT+F10 (Display the shortcut menu for the selected item)

27. ALT+SPACEBAR (Display the System menu for the active window)

28. CTRL+ESC (Display the Start menu)

29. ALT+Underlined letter in a menu name (Display the corresponding menu) Underlined letter in a command name on an open menu (Perform the corresponding command)

30. F10 key (Activate the menu bar in the active program)

31. RIGHT ARROW (Open the next menu to the right, or open a submenu)

32. LEFT ARROW (Open the next menu to the left, or close a submenu)
33. F5 key (Update the active window)


34. BACKSPACE (View the folder one level up in My Computer or Windows Explorer)

35. ESC (Cancel the current task)

36. SHIFT when you insert a CD-ROM into the CD-ROM drive (Prevent the CD-ROM from automatically playing)


Some Other Useful Keyboard Shortcuts

1. CTRL+TAB (Move forward through the tabs)

2. CTRL+SHIFT+TAB (Move backward through the tabs)

3. TAB (Move forward through the options)

4. SHIFT+TAB (Move backward through the options)

5. ALT+Underlined letter (Perform the corresponding command or select the corresponding option)

6. ENTER (Perform the command for the active option or button)

7. SPACEBAR (Select or clear the check box if the active option is a check box)

8. Arrow keys (Select a button if the active option is a group of option buttons)

9. F1 key (Display Help)

10. F4 key (Display the items in the active list)

11. BACKSPACE (Open a folder one level up if a folder is selected in the Save As or Open dialog box)

Microsoft Natural Keyboard Shortcuts

1. Windows Logo (Display or hide the Start menu)

2. Windows Logo+BREAK (Display the System Properties dialog box)

3. Windows Logo+D (Display the desktop)

4. Windows Logo+M (Minimize all of the windows)

5. Windows Logo+SHIFT+M (Restore the minimized windows)

6. Windows Logo+E (Open My Computer)

7. Windows Logo+F (Search for a file or a folder)

8. CTRL+Windows Logo+F (Search for computers)

9. Windows Logo+F1 (Display Windows Help)

10. Windows Logo+ L (Lock the keyboard)

11. Windows Logo+R (Open the Run dialog box)

12. Windows Logo+U (Open Utility Manager)

 Accessibility Keyboard Shortcuts

14. Right SHIFT for eight seconds (Switch Filter Keys either on or off)

15. Left ALT+left SHIFT+PRINT SCREEN (Switch High Contrast either on or off)

16. Left ALT+left SHIFT+NUM LOCK (Switch the MouseKeys either on or off)

17. SHIFT five times (Switch the Sticky Keys either on or off)

18. NUM LOCK for five seconds (Switch the ToggleKeys either on or off)

19. Windows Logo +U (Open Utility Manager)

 Windows Explorer Keyboard Shortcuts

21. END (Display the bottom of the active window)

22. HOME (Display the top of the active window)

23. NUM LOCK+Asterisk sign (*) (Display all of the subfolders that are under the selected folder)

24. NUM LOCK+Plus sign (+) (Display the contents of the selected folder)

25. NUM LOCK+Minus sign (-) (Collapse the selected folder)

26. LEFT ARROW (Collapse the current selection if it is expanded, or select the parent folder)

27. RIGHT ARROW (Display the current selection if it is collapsed, or select the first subfolder)

Character Map After you double-click a character on the grid of characters, you can move through the grid by using the keyboard shortcuts:

1. RIGHT ARROW (Move to the right or to the beginning of the next line)

2. LEFT ARROW (Move to the left or to the end of the previous line)

3. UP ARROW (Move up one row)

4. DOWN ARROW (Move down one row)

5. PAGE UP (Move up one screen at a time)

6. PAGE DOWN (Move down one screen at a time)

7. HOME (Move to the beginning of the line)

8. END (Move to the end of the line)

9. CTRL+HOME (Move to the first character)

10. CTRL+END (Move to the last character)

11. SPACE BAR Switch between Enlarged and Normal mode when a character is selected.

Microsoft Management Console (MMC)Main Window Keyboard Shortcuts

1. CTRL+O (Open a saved console)

2. CTRL+N (Open a new console)

3. CTRL+S (Save the open console)

4. CTRL+M (Add or remove a console item)

5. CTRL+W (Open a new window)

6. F5 key (Update the content of all console windows)

7. ALT+SPACEBAR (Display the MMC window menu)

8. ALT+F4 (Close the console)

9. ALT+A (Display the Action menu)

10. ALT+V (Display the View menu)

11. ALT+F (Display the File menu)

12. ALT+O (Display the Favorites menu)

MMC Console Window Keyboard Shortcuts

1. CTRL+P (Print the current page or active pane)

2. ALT+Minus sign (-) (Display the window menu for the active console window)

3. SHIFT+F10 (Display the Action shortcut menu for the selected item)

4. F1 key (Open the Help topic, if any, for the selected item)

5. F5 key (Update the content of all console windows)

6. CTRL+F10 (Maximize the active console window)

7. CTRL+F5 (Restore the active console window)

8. ALT+ENTER (Display the Properties dialog box, if any, for the selected item)

9. F2 key (Rename the selected item)

10. CTRL+F4 (Close the active console window. When a console has only one console window, this shortcut closes the console)

Remote Desktop Connection Navigation

1. CTRL+ALT+END (Open the Microsoft Windows NT Security dialog box)

2. ALT+PAGE UP (Switch between programs from left to right)

3. ALT+PAGE DOWN (Switch between programs from right to left)

4. ALT+INSERT (Cycle through the programs in most recently used order)

5. ALT+HOME (Display the Start menu)

6. CTRL+ALT+BREAK Switch the client computer between a window and a full screen.
7. ALT+DELETE (Display the Windows menu)

8. CTRL+ALT+Minus sign (-) (Place a snapshot of the active window in the client on the Terminal server clipboard and provide the same functionality as pressing PRINT SCREEN on a local computer.)

9. CTRL+ALT+Plus sign (+) (Place a snapshot of the entire client window area on the Terminal server clipboard and provide the same functionality as pressing ALT+PRINT SCREEN on a local computer.)

In this post you have learn about some keyboard shortcut keys. If you found any mistake please let me know through comment and if you like this post please share more and more, also like my Facebook page.

Thankyou!

Top 10 Search Engine That you want to Know


Hello Friends, I am back with some new topics, Before starting know about top 10 search engine we must have the knowledge of what is web search engine and what he do? Web search engine, when you open your Google chrome, Mozilla Firefox, Internet Explorer etc, you see search engine in front of screen. It is a software system.  Search engine show result which you want to see on World Wide Web. You can also say search engine is a filter of World Wide Web. Today we will discuss on top 10 search engine, who show fast result at your screen which you want to see it.


1. GOOGLE


Google is a search engine which is launched in September 4, 1998. Larry Page and Sergey Brin is a founder of Google search engine. It search engine slogan is “Don’t be evil”. Sunder Pichai is a ceo of Google Inc. 3.5 billion Per day visitors use Google search engine. Google alexa rank is 1 global rank and 1 in United States rank (23 june 2016).


2. BING


Bing is a search engine which is launched in June 1, 2009. Microsoft is a founder of
Bing search engine. It search engine slogan is “Bing is for doing(2012 and Being and Decide 2009)”.62,240,000 Per day visitors use Bing search engine. Bing alexa rank is 4 global rank and 1 in china rank (23 june 2016).


Yahoo is a search engine which is launched in March2, 1995. Yahoo is better known as yahoo search. Jerry Yang and David Filo is a founder of Yahoo!. $ 3.3 million monthly visitors use Yahoo search engine.  Yahoo alexa rank is 5 global rank and 5 in United States rank (23 june 2016).

4. BAIDU


Baidu is a search engine which is launched in January  2000. Baidu is a Chinese web service. It is the one most of the developing search engine. 62,240,000 per day visitors use Baidu search engine. Baidu alexa rank is 4 global rank and in china rank 1(23 june 2016).

5. AOL


Aol is a search engine which is launched in 1983. Aol better known as America online. Aol search engine created by Tim Armstrong. It is the one most of the developing  search engine at a time. 125,000,00 monthly visitors use Aol search engine. Aol alexa rank is 169 global rank (23 june 2016).

6. Webcrawler


Webcrawler is a search engine which is launched in April, 1994. Webcrawler search engine created by Brain Pinkerton. It is a metasearch engine. 1.7 million mothly U.S visitors use Webcrawler search engine. webcrawler alexa rank is 2,324 global rank (23 june 2016).


7. Excite


Excite is a search engine which is launched in December, 1995.Excite search engine created by  Graham Spencer, Joe Kraus, Mark Van Haren, Ryan Mclntyre, Ben Lutch and Martin Reinfried. It is the one most developing search engine in our time. 125,000,000 mothly visitors use Excite search engine. Excite alexa rank is 9,969 global rank (23 june 2016).


8. Yandex


Yandex is a search engine which is launched in 1997. It is the one of the best growing web search engine. Yandex search engine created by Arkady Volozh, Arkady Borkovsky and llya segalovich. It search engine slogan is “This Search engine doesn’t track you”.45 million monthly visitors use Yandex search engine. Yandex alexa rank is 1,739 global rank(23 june 2016).


 9. Chacha


Chacha is a search engine which is launched in September 1, 2006. ChaCha search engine slogan is “Powered by People”.ChaCha search engine created by Scott A Jones and Brad Bostic. It is a human guided search engine. when you type something it show result like man reply your answer.  You can use this app on mobile its free. If you have any problem send ChaCha message he reply you, text your question to chacha at 242242 on your mobile device. ChaCha send guide on your mobile. ChaCha alexa rank is 7971 global rank (23 june, 2016).


10. DuckDuckGo


DuckDuckGo is a search engine which is launched in September 25, 2008. It is the one of the best growing web search engine. DuckDuckGo search engine created by Gabriel Weinberg. It search engine slogan is “This Search engine doesn’t track you”.13,000,000 monthly visitors use DuckDuckGo search engine. DuckDuckGo alexa rank is 778 (april 2016).


These are the TOP 10 Power full search engines that you have to know.


How to Lock a Folder Using Code.


Hello friends, In this tutorial we will discuss on How to lock a folder without any software. Before starting this tutorial we must have the knowledge of how to create a folder and why folder privacy is important for us.  Today I tell you two simple methods to protect your folder. I hope that will you really enjoy this.

So lets get Start:-


METHOD FIRST

1)  Create a folder which you want to put your password.
2)  Open your notepad and paste the code in your notepad.

cls
@ECHO O
FF
title my Folder Private
if EXIST "Control Panel.{21EC2020-3AEA-1069-A2DD-08002B30309D}" goto UNLOCK if NOT EXIST Private goto MDLOCKER
:CONFIRM
echo Are you sure you want to lock the folder(Y/N) set/p "cho=>" if %cho%==Y goto LOCK if %cho%==y goto LOCK if %cho%==n goto END if %cho%==N goto END echo Invalid choice. goto CONFIRM :LOCK ren Private "Control Panel.{21EC2020-3AEA-1069-A2DD-08002B30309D}" attrib +h +s "Control Panel.{21EC2020-3AEA-1069-A2DD-08002B30309D}" echo Folder locked goto End :UNLOCK
echo Enter password to unlock folder set/p "pass=>"
if NOT %pass%== PASSWORD_COMES_HERE goto FAIL attrib -h -s "Control Panel.{21EC2020-3AEA-1069-A2DD-08002B30309D}" ren "Control Panel.{21EC2020-3AEA-1069-A2DD-08002B30309D}" Private echo Folder Unlocked successfully goto End :FAIL
echo Invalid password goto end :MDLOCKER
md Private
echo Private created successfully goto End :End


3) when you open your code in notepad put your password name and put password, see below image.

4)  when you put your folder name and password go to file and click on save as and put your file and name and put his extension (your folder name.bat) and save as file column put (All Files). See image.

5) Remember save your file in which place where you want to hide your personal data. Then close your notepad. And go your folder where you save your data, you see your bat file. Double click on it and you see a folder, put your data in your folder. See image.


6) When you put your data in folder, double click your bat folder and you see a window screen in front of you type here “y” and enter, you see your private folder is hidden, then go back on folder  and click on it and hide this folder no one see your personal folder and if anyone see your folder then he have to put password a password to open your private or personal folder.


All Done.

I will Post other methods later to lock Folder easily.

Please don't forget to Share. 
<

Tuesday, 15 November 2016

How To Download Instagram photos


Hello Friends Today i will tell you to download the Instagram Photos, many users ask me how to download the Instagram Photos. So i have found the method to download, but friends it is not so easy method. it is so difficult.

Before starting this tutorial we must have the knowledge of what is Instagram, Instagram is social networking site like Facebook, Twitter, Google Plus, LinkedIn etc. Instagram is a social mobile network site, where we share your Picture, video. Here you share your picture and video as publicly or privately. You also chat on Instagram. Instagram monthly users are 400 million active accounts on Instagram. Instagram global and United States rank is 19(June, 2016). 

So lets get started how to download Instagram photos.

In Instagram many people face download photos problem, today we will discuss how to download Instagram photos. It is very simple method to download Instagram pictures or photos. I hope that will you really enjoy this.

Step 1:- First visit Instagram official website and login in your Instagram account.


Step 2:- Select any picture which you want to download,Suppose i want this pic download, See below image. 

Step 3:- when you select the picture, go on URL link and delete link and press enter (see image).


Step 4:- When you delete the link and press enter, then right click on image and go view page source and shortcut key is Ctrl+ U.


Step 5:- when you click on view image source, a new tab open in your browser , go on this tab and press Ctrl+F and write jpg (see  image) then select the link of the image.


Step 6:- Just copy your link and paste in new tab. Now right click on your image and save your image.


All Done!!!

Here you learn very simple process to download Instagram photos. If you have any query related this topic, please let me know through your comment. And if you like my tutorial don’t forget to share my post. And you also follow me on Twitter and like my Facebook page.